Bidding
Bidding is the first thing done at the start of every game to determine play order (when following the rules included in Starter Decks, you instead flip a coin). Players secretly choose a number of Burdens which, win or lose, are placed upon their Ring-bearer when the game starts. The winner of this hidden bid gets to choose whether they go first or second, determining if they start the game as Free Peoples or Shadow.
Who goes first?
In the Starter Rules, players decide randomly who goes first. Normally, however, players bid burdens to determine this.
Players place secret bids for the right to determine who goes first in the game. The bidding is done with black tokens, which will become burdens on your Ring-bearer.
Each player secretly places a number of burdens in his hand (you may bid zero). When all players are ready, simultaneously reveal the bids. The highest bid wins the right to choose where he goes in the turn order. Any choice is available.
Next, the second highest bidder chooses from the remaining positions in the turn order, and so on. Keep track of each player’s bid, as these tokens will become burdens on his Ring-bearer.
If there are any ties, then the tied players resolve randomly who chooses first among them.
- #Who_goes_first.3F section
Strategic Considerations[edit]
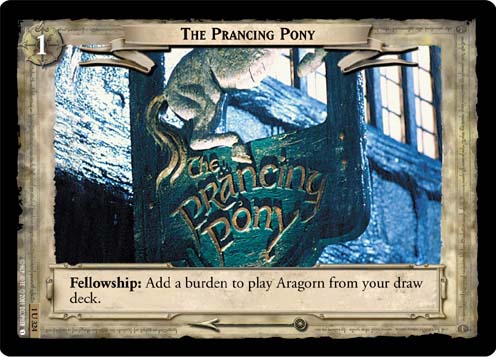
Because bidding is a part of setting up the game, it can strongly influence how you build your deck, and deserves careful planning. It is a powerful advantage to be able to go first, as this allows you to place down your own copy of site 1 (often with key game text for for furthering your Free Peoples' setup. Think: The Prancing Pony (1U324)
 ), and because this immediately puts your Free Peoples in the lead in their race towards site 9. The pressure is now on for your opponent to either slow your Free Peoples down, or, more rarely, to use cards which add to the move limit for their turn. Theoretically, if they fail in these endeavors, there is nothing their Free Peoples' side can do to keep up.
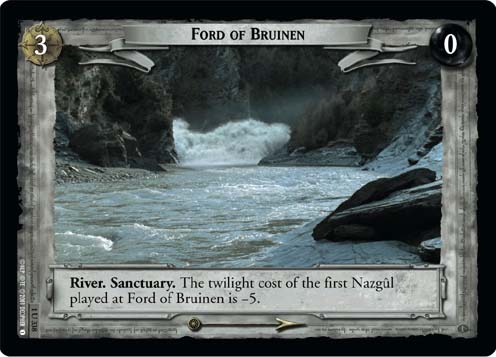
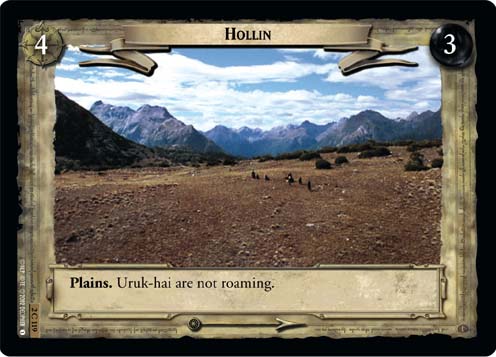
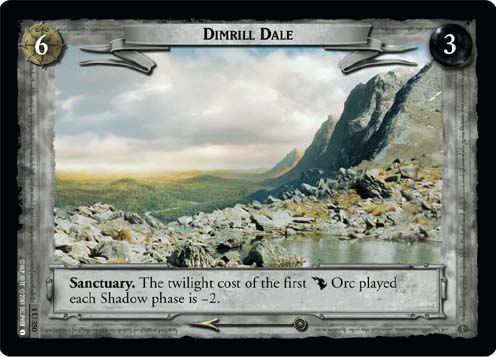
Bidding high comes with great risks, however. The number of tokens you choose to bid will become the number of burdens with which your Ring-bearer begins the game, and there are powerful shadow cards--and entire shadow strategies--which grow in power as the burdens begin to stack up. Furthermore, going first--if that is your choice after winning your bid--allows your opponent to play their sites down on the adventure path, beginning from site 2, and going all the way until their Free Peoples (potentially) outpaces you. This allows for powerful site-based shadow support, as seen with cards like Ford of Bruinen (1U338)
 , Hollin (2C119)
 and Dimrill Dale (1U350)
 . And finally, going first requires your Free Peoples to step out on their first turn with only those resources found in your opening hand, or otherwise fetched out by your Site 1. This may not be a problem at all; there's always a chance that your opening hand will be stellar. But a Free Peoples' strategy which intends to go first should account in some way for the risk of a very poor opening hand--and this largely comes down to the self-sufficiency of the starting Fellowship (and, as appropriate, the companion possibly fetched by site 1).
The risk of starting with too many burdens can be powerfully countered by the use of Sam, Son of Hamfast (1C311)
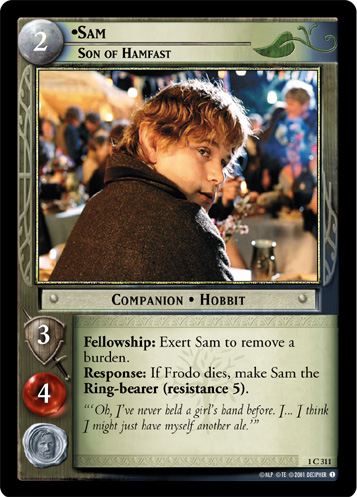 in your starting fellowship. However, Sam comes with a twilight cost of 2, which leaves only two further twilight to spend on other companions. Alternatively, in the proper block/format, Sam might be fetched by The Green Dragon Inn (1U322)
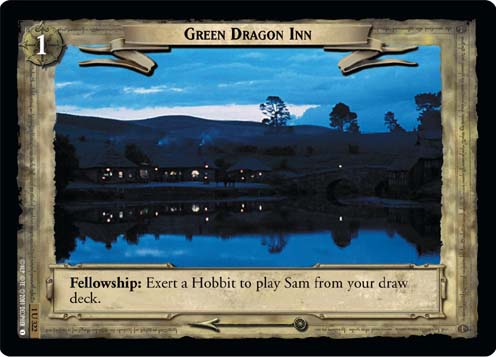 with relative ease, at the cost of otherwise being able to fetch a more stalwart fighter, such as Aragorn.
There are benefits to bidding low, particularly for a deck strategy which is designed around going second. Being able to confidently bid zero burdens leaves your Ring-bearer quite healthy to begin the game, which at the very least gives you time to see what shadow strategy your opponent is playing. If you begin to see that burdens won't be too much of a risk against your opponent's shadow side, then you can more reliably involve your Ring-bearer in skirmishes and archery fire, thereby protecting some of your other key companions, as they in turn protect your Ring-bearer. Going second also gives you a chance to reconcile after your first Shadow phase, and take your first Free Peoples turn with a good probability of a stronger hand than your first 8 cards.
Finally, it is worth noting that the winner of the bid gets to choose where he or she will go in the turn order. So, winning a bid can mean going second, if that is your gameplan.
| Game Concepts |
|---|
| Play Area | ||||
|---|---|---|---|---|
| Piles | Draw Deck | Adventure Deck | Discard Pile | Dead Pile |
| Other | Fellowship | Support Area | Twilight Pool | Adventure Path |
| The Turn Sequence | ||||||
|---|---|---|---|---|---|---|
| Fellowship Phase | Shadow Phase | Maneuver Phase | Archery Phase | Assignment Phase | Skirmish Phase | |