Whip of Many Thongs (2R74)
Back to Mines of Moria Index |
Bill Ferny, Swarthy Sneering Fellow (2R75) |
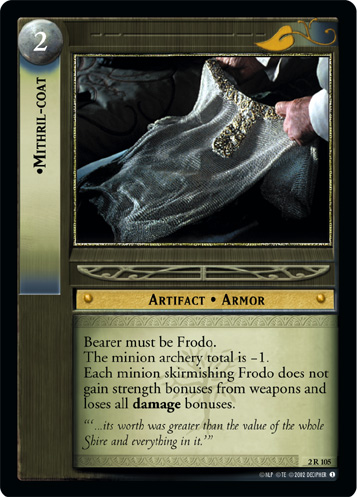
Whip of Many Thongs (2R74) is a ![]() Moria Artifact from the Mines of Moria set. Since it specifies classes of cards rather than a type it is one of few cards capable of discarding Free Peoples artifacts, though only Mithril-coat (2R105)
Moria Artifact from the Mines of Moria set. Since it specifies classes of cards rather than a type it is one of few cards capable of discarding Free Peoples artifacts, though only Mithril-coat (2R105)
 and Mithril-coat, Dwarf-mail (13R153)
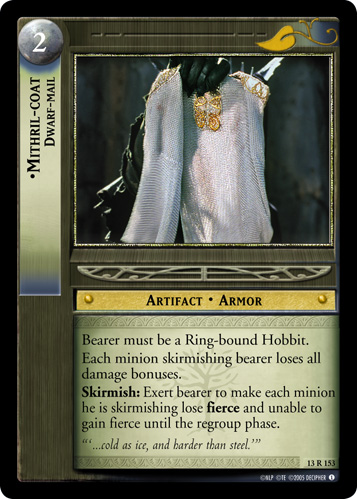 have a relevant class.
| ||||||||||||||||||||||||||||||||||||
| ||||||||||||||||||||||||||||||||||||
| ||||||||||||||||||||||||||||||||||||
| ||||||||||||||||||||||||||||||||||||
| ||||||||||||||||||||||||||||||||||||


Strategy[edit]
Gameplay Strategy[edit]
The Bridge of Khazad-dûm (1C349)
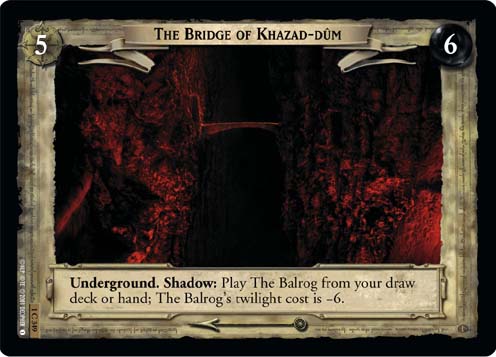 establishes a simple, unavoidable fact: every Fellowship Block deck needs a Balrog Contingency Plan. While there are many contingency plans available (some more favorable than others), a common one is using Armor (1C92)
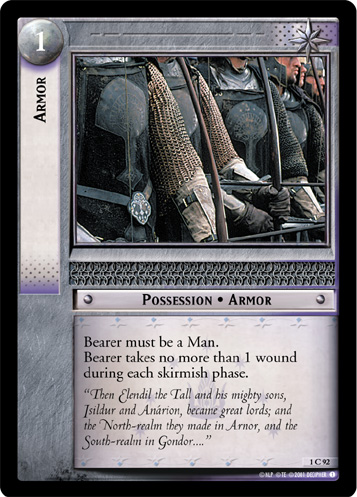 or similar wound prevention already included for Uruk-hai to minimize the impact of The Balrog. Whip of Many Thongs is the Shadow player's response, a sort of contingency plan for a contingency plan. The extra point of strength, while seemingly minor, is all The Balrog needs to kill companions with an 18 strength overwhelm threshold - that is, 9 strength companions or 6 strength companions with an overwhelm modifier - who might otherwise survive the skirmish, robbing the Free Peoples of additional survival tactics.
Unfortunately, players have a great deal of freedom of choice for how they handle The Balrog. Site 5 often comes before players are halfway through their decks so many different avenues are incorporated to ensure that least one of them is available by the time the fellowship approaches The Bridge. Skirmish cancellation is typically the best and most popular plan -- rather than figure out how to minimize the harm done by skirmishing The Balrog, a Free Peoples can simply avoid the skirmishes altogether. Since the Free Peoples can always take the first action and cancelling the skirmish ends it immediately, even if The Balrog with Whip of Many Thongs is assigned to skirmish a Frodo bearing Mithril-coat (2R105)
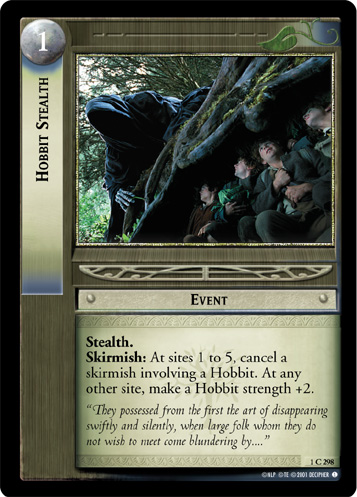
there may be no opportunity to crack that Whip's potential. The universal benefit of Hobbit Stealth (1C298)
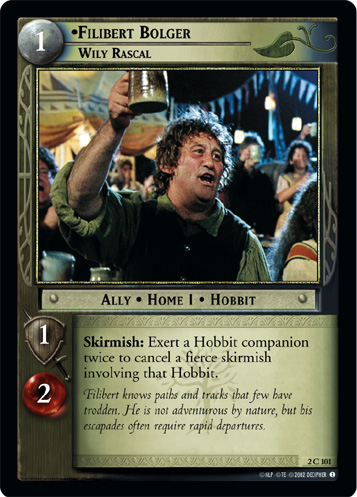
 both up to and beyond site 5 in keeping the Ring-bearer alive makes it more likely that at least one skirmish is avoided than not, and other utility cards like Filibert Bolger, Wily Rascal (2C101)
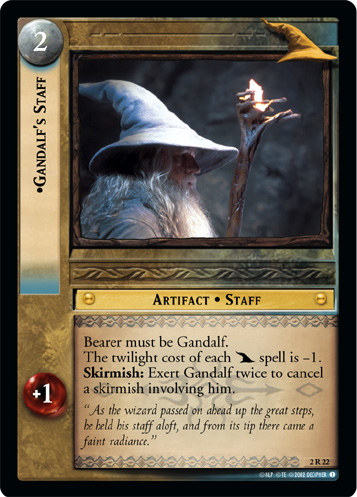
 and Gandalf's Staff (2R22)
 mean that some games the Fellowship will simply give The Balrog the slip both times.
Even when Whip does work, it may not work in the way the Shadow player expects or desires since the Free Peoples player is (usually) in charge of all assignments. If an armor is important to the survival of the Fellowship, The Balrog can often simply be assigned to skirmish a different companion. As such, it is better to think of Whip first and foremost as a deterrent to assign The Balrog to companions bearing armors rather than as a particularly effective way to get rid of any armors.
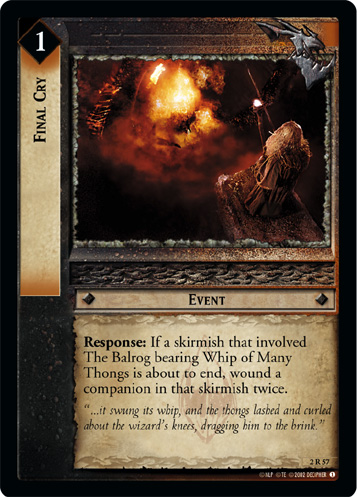
Balrog Contingency Plans are made because The Balrog is always a possibility regardless of the broader goals a Shadow side may have. Free Peoples sides, meanwhile, may not have any type of armor at all. Even for decks with armor, the odds are slim that not only is the Free Peoples player able put it in play by the time the Fellowship has to step on Khazad-dum and that the Shadow player is able to draw Whip in time, but also that playing it makes a meaningful difference in how skirmishes are handled. This particular combination of facing the right deck where both players draw the right cards at the right time far outweighs what Whip is actually able to do. In short, Whip of Many Thongs is exceedingly difficult to meaningfully use in Fellowship Block. When it does get played, it is seldom for its own merits and instead to enable the infamously tempting combo card Final Cry (2R57)
 .
.
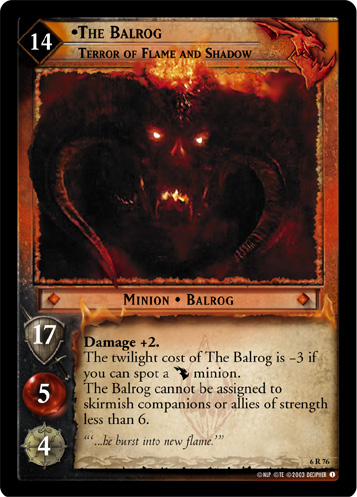
Starting in Towers Standard, The Balrog, Terror of Flame and Shadow (6R76)
 can show up anywhere on the site path with a high enough damage bonus to kill most unprotected companions outright. The assignment restriction makes it difficult to assign to a Hobbit (the primary beneficiaries of skirmish cancellation), leaving most Fellowships with no choice but to confront The Balrog directly. If its damage bonus is nullified by an armor, however, instead of break a companion's back it will cause little more than a mild sprain. Men take a more prominent role in Towers as well, with easy access to Armor (1C92)
to block wounds. Given fewer ways to avoid skirmishes and greater availability of armors, it would seem that the main problems discouraging its use in Fellowship Block are solved. Nevertheless, it often happens that a problem comes along in a later format that doesn't exist in earlier ones -- especially in a shift as drastic as the one between Fellowship and Towers blocks. Of all the changes, few cost Whip, its bearer, and a wide swath of tactics fundamental to Fellowship Block more than the two below.
can show up anywhere on the site path with a high enough damage bonus to kill most unprotected companions outright. The assignment restriction makes it difficult to assign to a Hobbit (the primary beneficiaries of skirmish cancellation), leaving most Fellowships with no choice but to confront The Balrog directly. If its damage bonus is nullified by an armor, however, instead of break a companion's back it will cause little more than a mild sprain. Men take a more prominent role in Towers as well, with easy access to Armor (1C92)
to block wounds. Given fewer ways to avoid skirmishes and greater availability of armors, it would seem that the main problems discouraging its use in Fellowship Block are solved. Nevertheless, it often happens that a problem comes along in a later format that doesn't exist in earlier ones -- especially in a shift as drastic as the one between Fellowship and Towers blocks. Of all the changes, few cost Whip, its bearer, and a wide swath of tactics fundamental to Fellowship Block more than the two below.
First, while The Balrog can be played anywhere, it is no longer guaranteed anywhere and is expensive everywhere. This makes it a much less attractive prospect for a deck in the first place, as not only must The Balrog be drawn along with Whip but they both must be drawn at the right time. Drawing either of them too soon usually leaves players better off discarding them before the card sits out too long in hand and hand clog saps the rest of the deck of much-needed card flow. This leaves little for players to do - must Whip itself be the card needed to break through a particularly tough Free Peoples - but add more copies to offset having to discard early ones or hope that the one they have will appear late enough that it won't cause issues at the start, similar to an issue faced in Fellowship block with the timing reversed. Second, and perhaps even more importantly, is the impact the rare versions of Grima have on the game.
For Whip, the relevant one is Gríma, Wormtongue (4R154)
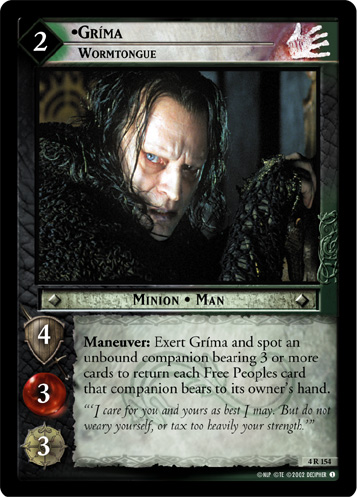 . When something's going wrong with one side of the deck it doesn't necessarily impact the other, but when a stack of Free Peoples cards returns to a player's hand in the middle of the turn it means they lose both resources to keep their Free Peoples healthy and the ability to fill their hand with Shadow cards from the deck. This double whammy can end the game single-handedly by stopping the current player's move and enabling an easy double for the opponent, so the mere possibility of Wormtongue makes most players avoid putting more than two cards on a companion at all. Generally players prioritize offensive cards over defensive ones, causing armor of all sorts to be less popular than they were in Fellowship block.
Still, there are a few ways players skirt around Grima to let a companion use what Whip pitches to the discard pile. Since Wormtongue only affects unbound companions, Ring-bound companions have fewer concerns with bearing many possessions. A ![]() Gondor Ring-bearer can be one of few instances where an overwhelm-preventing armor such as Coat of Mail (1C101)
Gondor Ring-bearer can be one of few instances where an overwhelm-preventing armor such as Coat of Mail (1C101)
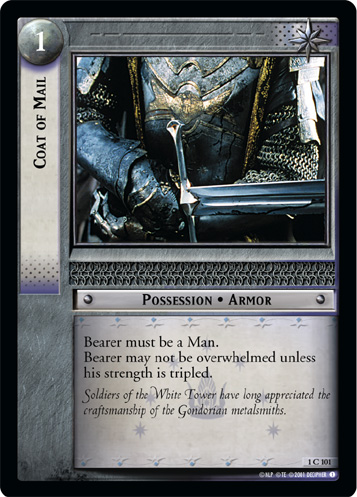 might be endangered, as those companions have less trouble taking many wounds thanks to The One Ring. Slaked Thirsts (7U14)
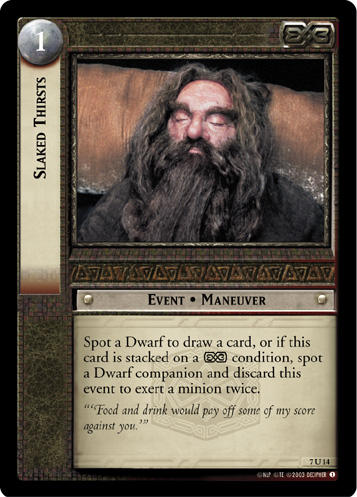 can neutralize Wormtongue and safeguard Durin III, Dwarven Lord (9R+3)
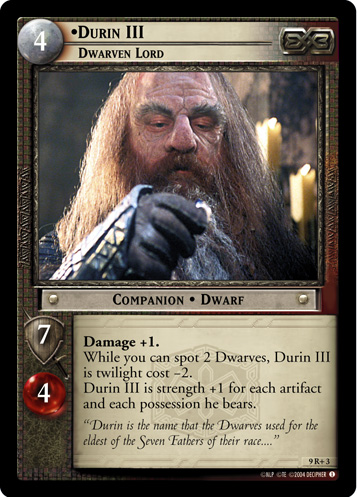 , renowned for his text which encourages stacking as many cards on him as the Free Peoples player can find. He can reach 19 strength by bearing every eligible
 ![]() Dwarven possession, so even though removing armor had been strictly concerned with removing defenses before, now Whip hits an unexpected vulnerability in a character's strength. And of course, some players will still see value in defensive gear and prioritize it as one of their two "safe" cards for a companion as a way to handle big threats.
Dwarven possession, so even though removing armor had been strictly concerned with removing defenses before, now Whip hits an unexpected vulnerability in a character's strength. And of course, some players will still see value in defensive gear and prioritize it as one of their two "safe" cards for a companion as a way to handle big threats.
In Expanded, The Balrog, The Terror of Khazad-dum (12R79)
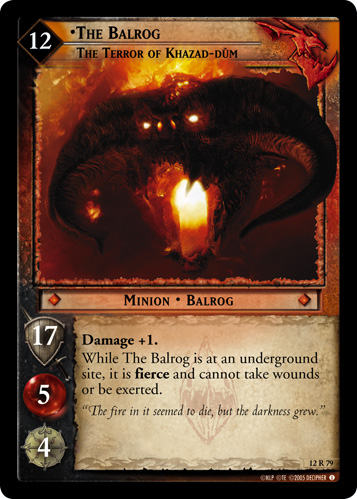 cannot take advantage of Whip very well since its primary benefits come from being underground where even a Shadow card cannot exert it. The Balrog, Demon of Might (19P18)
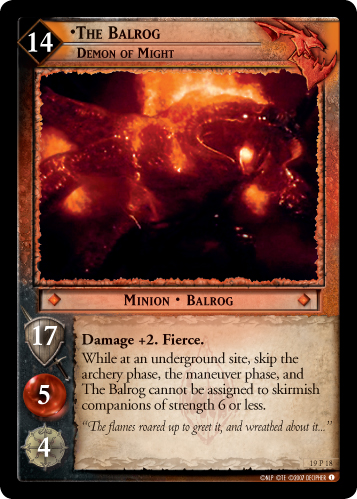 is typically the only Balrog worth considering in any format where it is legal anyway, a good candidate for Whip of Many Thongs for the same reasons as Terror of Flame and Shadow with the addition of being fierce and skipping many troublesome phases when underground. The Bridge of Khazad-dûm (12U186)
 helps to somewhat alleviate the twilight cost without typically helping opponents, effectively acting as an extra site with a Shadow number 3.
Helm and shield classes are also specifically targeted by Whip, yet there is hardly an opportunity or advantage to doing so. Armors typically only help skirmishing companions, meanwhile helms and shields are more often put in to shape how supporting characters help the Fellowship survive -- characters that are unlikely to skirmish The Balrog without dying regardless. The only two helms in the game are discarded to some effect: Gimli's Helm (1R15)
 is discarded to prevent all wounds and Rohirrim Helm (5R89)
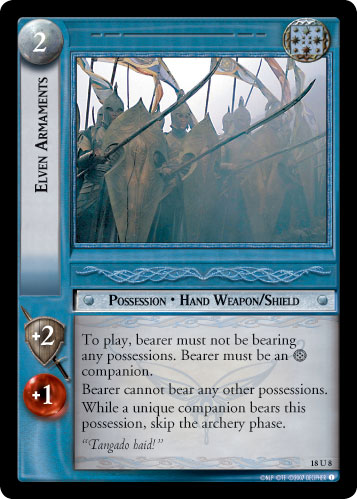
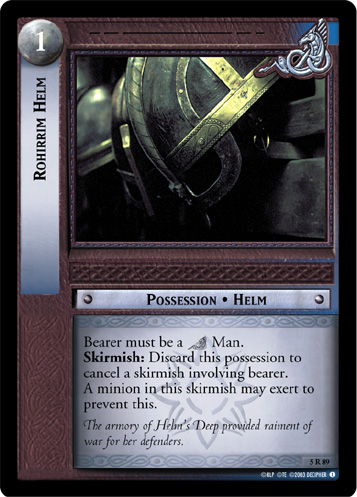 discards to let the Shadow player exert or cancel a skirmish. The Shadow player can hope that Whip forces the Free Peoples player to use these helms, but the Free Peoples probably wouldn't assign those companions to skirmish in the first place without already planning to use them. There are more shields, but for most of the game's lifespan their primary function is to reduce the archery total and are they not often played as a result. The shields released in Hunters Block break the mold, Elven Armaments (18U8)
 and Sturdy Shield (15R141)
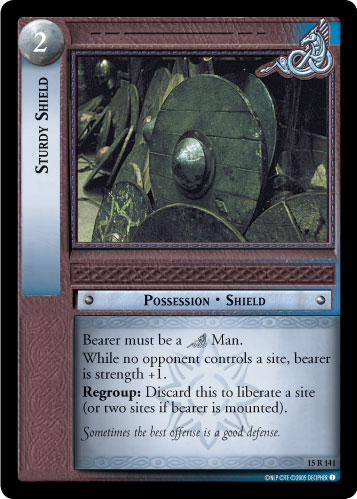 have offensive uses so the potential to lose them is somewhat more likely to be an influence on assignments.
Deckbuilding Strategy[edit]
The Balrog, Durin's Bane (2C51)
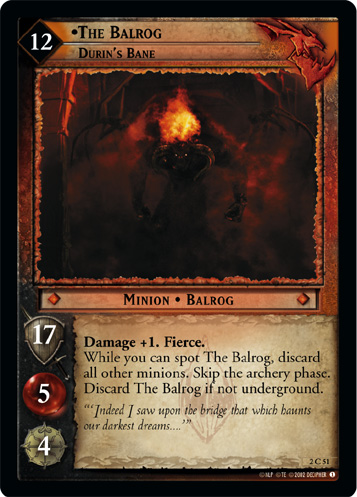 can be played in any Fellowship Block deck, so it may be tempting to add Whip into any deck. In practice it creates a common deckbuilding conundrum: how can one add enough copies of a card that it will be seen in time, but not so many that cards drawn too late get in the way? Since there is no way to fetch Whip of Many Thongs, this problem has no solution. Time-sensitive cards will consistently work against the deck and are often only worth including for a strategy if they can shape it up to win when either used or soon after. Whip simply doesn't have a strong enough impact to justify the downsides.
One of the biggest things holding it back is that it does not offer anything distinct. Beyond the Height of Men (2R39)
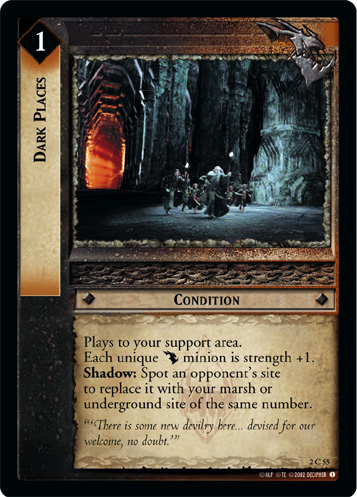
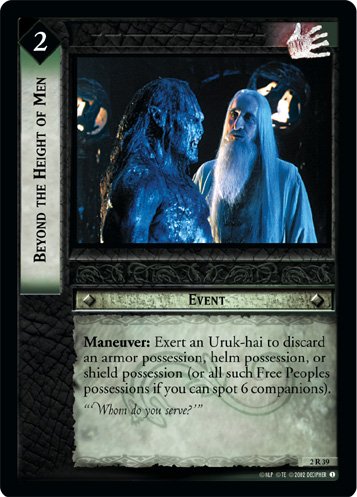 is a much better way to discard troublesome defensive possessions, so much that splashing a few Uruk-hai to get straightforward access to the effect is often more efficient. Later sets expand the availability of arbitrary possession discarding to the extent that class-specific discarding is rarely worth considering anyway. Dark Places (2C55)
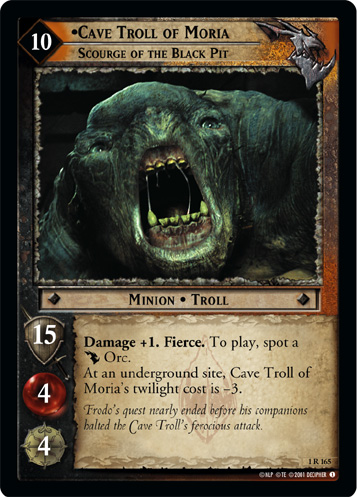
 provides a strength boost not just to The Balrog, but also to Cave Troll of Moria, Scourge of the Black Pit (1R165)
 and other unique minions. Goblin Spear (1C182)
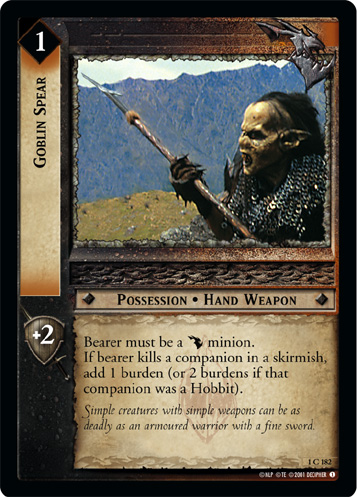 offers more strength playable on any
 ![]() Moria minion and able to be pulled from discard with Relics of Moria (1R195)
Moria minion and able to be pulled from discard with Relics of Moria (1R195)
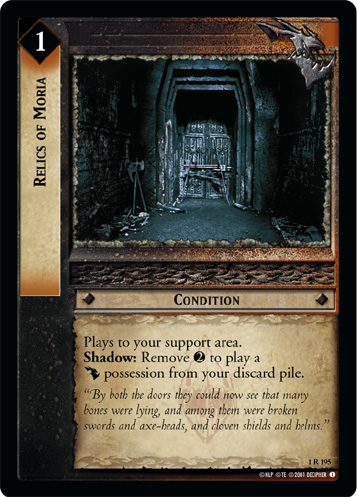 .
.
Towers Standard and The Balrog, Terror of Flame and Shadow (6R76)
make all Balrog-dependent cards a little more justifiable by opening them up for use anywhere along the site path. Yet Whip's benefits are so situational and minor that unless The Balrog is a key figure for your deck, you would often rather go forward with nearly anything else. If The Balrog is the focus it may be worth including to ensure that your opponent will not be able to easily manage skirmish losses and move ahead, though any deck that emphasizes a single minion is vulnerable to the numerous ways a Free Peoples might win or avoid challenging skirmishes. Even in ideal circumstances, Whip's impact will almost always be to get The Balrog assigned to companions already not bearing any armor which is often a less-than-ideal result.
If you are attempting a Final Cry (2R57)
deck in Fellowship block, you definitely need Whip of Many Thongs in hand by site 5 but you also can't let excess copies drown out Final Cry. What's more, the surprise factor is a big part of have the opportunity to play Final Cry at all so you don't want opponents to try to detect it based on how many copies of Whip are discarded. You will want at least 2 copies of Whip, as well as a deck that can discard other cards and draw new ones from the moment the game begins to get through as many cards as quickly as possible. However you go about it, remember that you need to have enough cards left for a competent Shadow side in its own right. Even if - and it's a big if - Final Cry scores a kill on one of the Free People's most important companions, unless it kills the Ring-bearer you still have another half of the game to worry about while digging through any additional copies of Whip and Final Cry. Similarly, since digging for specific Shadow cards is your goal you may have to sacrifice your Free Peoples side leading up to The Bridge. No matter what, be careful that it's not too late for your Free Peoples to make it to site 9 yourself!
Strengths and Weaknesses[edit]
Synergizes With...[edit]
- Final Cry (2R57)
, as when players are drawn to Whip it is often just for this card
- The Balrog's Sword (2R50)
 , to ensure the extra damage and strength bonuses matter
 - The Balrog, Terror of Flame and Shadow (6R76)
and The Balrog, Demon of Might (19P18)
, who have a hefty damage bonus innately
- Fill With Fear (2U56)
 , to protect The Balrog's vitality
Strong Versus...[edit]
- Any sort of armor, especially Armor (1C92)
-- when a card shares its name with a class intended to be counted by Whip, it good and well better be countered
- Companions with 9 strength, who may not have otherwise been in danger of being overwhelmed by The Balrog
Weak Versus...[edit]
- Skirmish canceling such as Hobbit Stealth (1C298)
- Gimli's Helm (1R15)
- Roll of Thunder (4U99)
- Particularly strong skirmishers who can reach 19 or more strength
- Comparatively weaker than nearly any other card if the Free Peoples has no armor or can survive The Balrog without having armor-bearing companions skirmish it, especially given how hard it is to play The Balrog in the first place
Alternate Versions[edit]
| Portrait | Name | Game Text |
|---|---|---|
 |
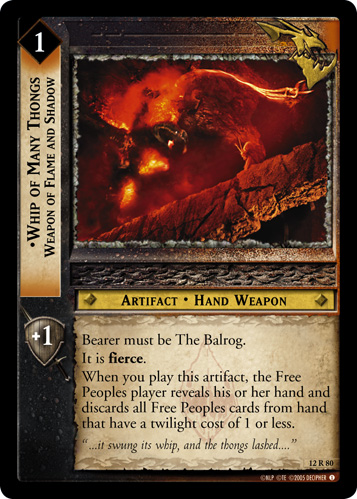
Whip of Many Thongs, Weapon of Flame and Shadow (12R80)
|
Bearer must be The Balrog. It is fierce.
When you play this artifact, the Free Peoples player reveals his or her hand and discards all Free Peoples cards from hand that have a twilight cost of 1 or less. |