|
|
| (10 intermediate revisions by the same user not shown) |
| Line 1: |
Line 1: |
| '''Rainbow Wounding''' is a [[Free Peoples]] deck most commonly seen in [[Movie Block]]. It uses [[direct wounding]] cards from a variety of [[culture]]s, often supplemented with a single strong [[tank]] companion or [[archery]] wounds. There are so many good direct wounding strategies in this format that it's mainly a matter of choosing which ones to use. The deck just needs two things: companions that wound minions, and some way to heal them. This isn't one deck so much as a catch-all for a handful of similar decks that are all hybrids of each other, and many of these strategies can and are often incorporated into other decks. Despite the variety, there are a handful of core cards that appear consistently in different versions of this deck: {{Card|Legolas, Greenleaf}}, {{Card|Eowyn, Lady of Ithilien}}, and {{Card|Smeagol, Always Helps}}. | | Frodo is one of the protagonists of ''The Lord of the Rings'', the [[hobbit]] who steadfastly carries [[the One Ring]] from the Shire to Mount Doom, where it is destroyed by [[Gollum]]. In this game, he is the default [[ring-bearer]] [[companion]], and indeed was the only ring-bearer until [[Reflections|the ninth expansion set]]. Except for his unusually high [[resistance]], his low [[strength]] (3) and relatively high [[vitality]] (4) are typical of hobbits, but generally make him the most vulnerable part of your [[Fellowship]]. |
|
| |
|
| The core plan is to kill [[minion]]s off before their skirmishes resolve. This can mean softening them up with {{Card|Slaked Thirsts}}, then finishing them off with {{Card|Legolas, Greenleaf}}. Or softening up a high-vitality minion with Greenleaf then skirmishing that minion with {{Card|Eowyn, Lady of Ithilien}} to wipe out many minions at once with her ability. It can happen entirely in the [[skirmish phase]], with {{Card|Smeagol, Always Hopes}} [[exhaust]]ing a minion then finishing it off with {{Card|Don't Look At Them}}. Or it can even happen in the [[Shadow Phase]], with one or more {{Card|Shadowplay}} activations followed by an {{Card|Underfoot}} finisher. Oftentimes, if a minion is dangerous because of an [[exert]]ion ability rather than because of its [[strength]] in a skirmish, just exerting it first can be enough.
| | Frodo has a suite of special rules to his name. He's always [[ring-bound]], even if it doesn't say so on his card. Except in the case of {{Card|Frodo, Frenzied Fighter}}, he's always your [[ring-bearer]] if he's in your deck, and thus costs zero [[twilight]]. Until [[Reflections]], he was the only possible [[ring-bearer]] at the start of the game, and (along with [[Sam]]) was one of only two characters with a [[resistance]] score. |
|
| |
|
| This gameplan is risky. If minions are too tough or numerous to kill with direct wounds, or simply immune, then you may be left scrambling to deal with them with low-strength, often-exhausted companions. But once it gets rolling, it [[Run|makes double moves]] very efficiently, since all of the minions are dead! It also very effectively shuts down many strategies that use one minion to [[buff]] another, or rely on [[spot]]ting a minion in play to execute some sort of strategy. Plus, if a minion is dead, who cares what its strength was?
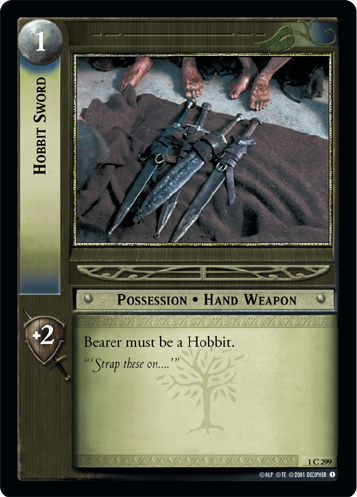
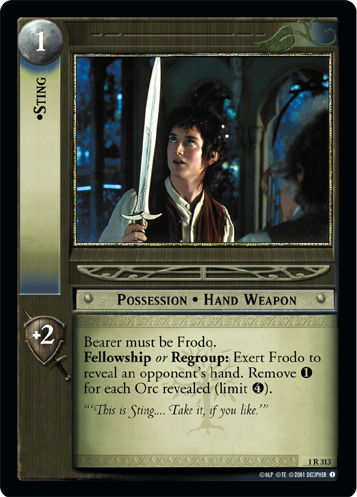
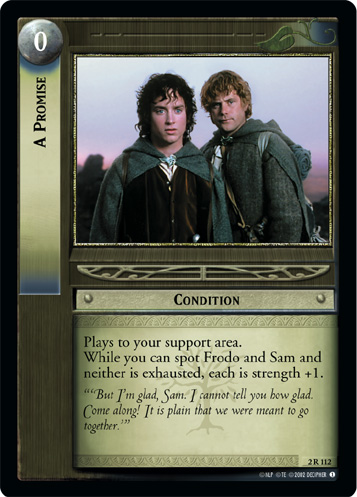
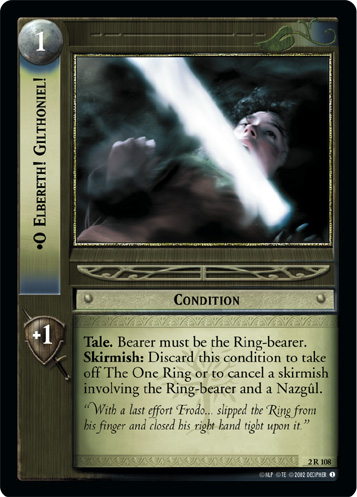
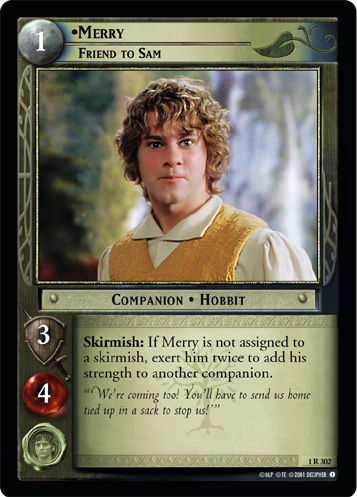
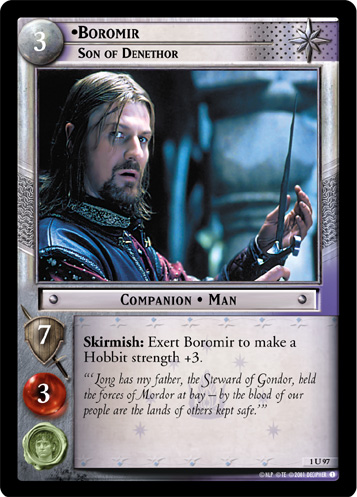
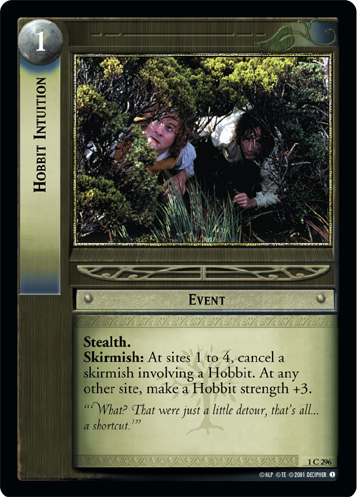
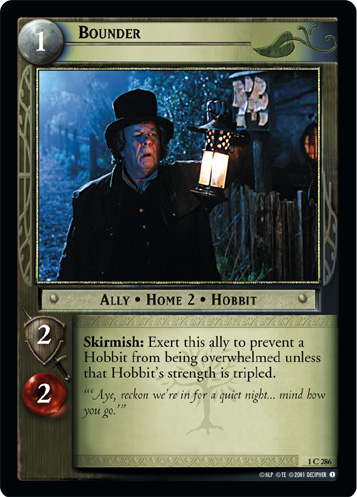
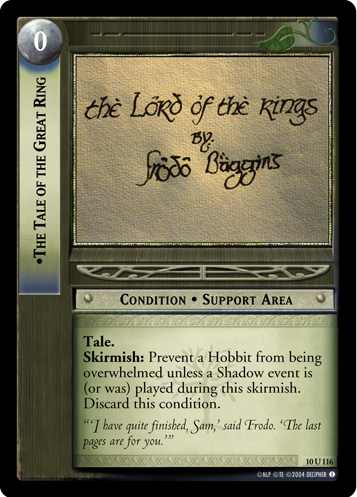
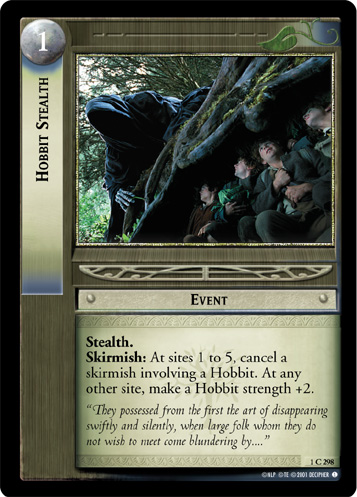
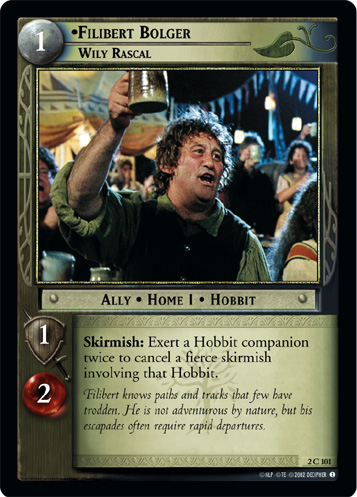
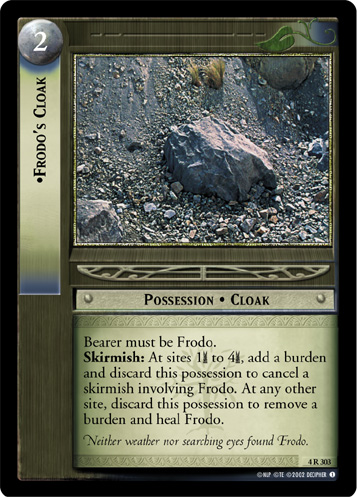
| | Because he is almost always your ring-bearer and so vulnerable to being [[overwhelm]]ed in a skirmish, getting the most out of Frodo involves protecting him, ideally keeping him away from [[skirmish]]es altogether. He has [[the One Ring]], but in most cases that is a poor defense against being overwhelmed. [[Swarm|Some decks]] will drag him into a skirmish anyway, however. To make him a bit safer, you can give him something to boost his strength. Permanent buffs include {{Card|Hobbit Sword}}, some version of {{Card|Sting}}, {{Card|A Promise}}, or {{Card|O Elbereth! Gilthoniel!}}. You can also [[pump]] his strength temporarily, especially with {{Card|Merry, Friend to Sam}}, {{Card|Boromir, Son of Denethor}}, or {{Card|Hobbit Intuition}}. You can protect him from being overwhelmed, with cards like {{Card|Bounder}} or {{Card|The Tale of the Great Ring}}. Or, in early formats like [[Fellowship Block]] and [[Towers Standard]], you can simply cancel his skirmish, with cards like {{Card|Hobbit Stealth}}, {{Card|O Elbereth! Gilthoniel!}}, {{Card|Filibert Bolger, Wily Rascal}}, or {{Card|Frodo's Cloak}}. |
|
| |
|
| The deck also often makes extensive use of the initiative conditions from [[Mount Doom]]: {{Card|Hardy Garrison}}, {{Card|A Light In His Mind}}, {{Card|Glimpse of Fate}}, and sometimes {{Card|Brooding on Tomorrow}}.
| | Frodo has three different roles in three different periods of the game. For the first eight sets, you have to play him, but you can [[Skirmish Cancellation|cancel his skirmishes]]. There's no way around it in [[Fellowship Block]], [[Towers Standard]], [[Towers Block]], or [[King Standard]]: you have to find a way to protect Frodo. |
|
| |
|
| == Greenleaf and Elven Support == | | == Versions of Frodo == |
| | {{PersonaTable|Frodo}} |
|
| |
|
| {{Card|Legolas, Greenleaf}} is a powerful card just on his base ability. He's always good for at least one wound, and he can pick off troublesome two-[[vitality]] characters on his own with no support. Give him cards that increase his vitality, like {{Card|The Tale of Gil-galad}} or {{Card|Aeglos}}, and he can handle even larger minions. You don't have to stop there; he can be supported with a larger {{Card|Elven}} contingent.
| | == Cards which mention Frodo by name == |
|
| |
|
| Elves have powerful, [[splash]]able healing to enable Greenleaf or other companions. {{Card|Elrond, Herald to Gil-Galad}} can fit into any deck, and opens up the possibility of including strong [[Condition Removal|condition removal]] like {{Card|Vilya}} or {{Card|Secret Sentinels}}. {{C|Elven}} culture has even more healing options that work only on elves, like the strong cycling tool {{Card|Shadow Between}} If your deck has a [[dwarf]] like {{Card|Gimli, Bearer of Grudges}}, you can also transfer wounds off of Greenleaf with {{Card|Shoulder to Shoulder}}, often to allies like Herald to Gil-Galad. If you're running Shoulder to Shoulder already, then {{Card|Elven}} allies like {{Card|Rumil, Elven Protector}} or maybe {{Card|Orophin, Lorien Bowman}} become more attractive. If you can't use their abilities because of your opponent's Shadow deck, then just use them as wound batteries!
| | ''to-do'' |
|
| |
|
| Greenleaf also has a Frodo [[signet]], so you can defend him in a skirmish with some of the Frodo signet [[event]]s discussed below, like {{Card|Mind Your Own Affairs}} and {{Card|No Use That Way}}. If you're doing that, then {{Card|Bow of the Galadhrim}} may be an option: if you kill the minion Legolas is skirmishing with a skirmish event, then you can wound another minion in another skirmish too.
| | == See Also == |
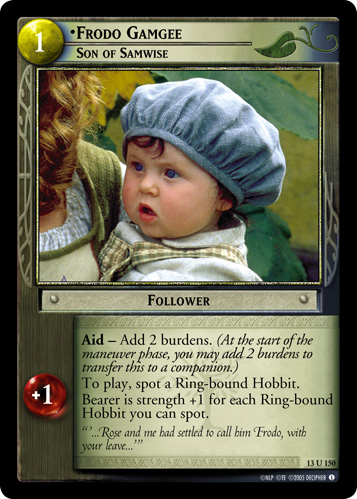
| | * {{Card|Frodo Gamgee, Son of Samwise}} |
|
| |
|
| Legolas can use {{Card|Double Shot}} to get an additional [[undirected wound]], but most of the other {{C|Elven}} archery cards have too much [[cultural enforcement]] to work in a rainbow deck. He's terrible at using {{Card|The Splendor of their Banners}} since it conflicts with his inherent exertion ability, and you need a lot of elf companions for cards like {{Card|Elven Bow}} or {{Card|Break the Charge}}.
| | [[Category:Unique Characters]] |
| | |
| While it isn't strictly a wounding card, {{Card|Glimpse of Fate}} only requires that you have two elves in play to play it, so Greenleaf and an elf ally are sufficient. And if Greenleaf dies afterward, it still keeps working just fine. Rainbow decks in [[Movie Block]] are often running multiples of these conditions, oftentimes with a discard outlet (like {{Card|Don't Look At Them}}) to activate them. If you need a discard outlet, to activate these initiative conditions or simply to [[cycle]] your hand, {{Card|Elven Sword}} is an option, although Legolas is a poor skirmisher.
| |
| | |
| Rainbow Wounding often runs a [[Tank|tank]] companion or two to help manage enemies that can't be wounded or are simply immune to direct wounding. {{Card|Arwen, Queen of Elves and Men}} is one option for that role, especially with her strong [[possession]]s like {{Card|Gwemegil}} and {{Card|Asfaloth}}/{{Card|Asfaloth, Elven Steed}}. Another choice is {{Card|Glorfindel, Revealed in Wrath}}, who is cheap, efficient, and also needs no support. Alternately, if you're running a largish elven contingent, {{Card|The Last Alliance of Elves and Men}} on a {{C|Gondor}} companion is an option. (At some point, though, that deck goes from being Rainbow Wounding to an [[Elfman]] deck.)
| |
| | |
| == Lady of Ithilien and Rohan support ==
| |
| | |
| If Greenleaf snipes minions, {{Card|Eowyn, Lady of Ithilien}} is carelessly flinging around grenades. While she's technically dealing [[undirected wounds]] (and your opponent will often try to kill off other, unimportant minions rather than the one she's skirmishing!), she does so much damage that she can finish off multiple badly-wounded minions at a time. She's one of the main cards that pushes Rainbow Wounding over the line, since on a good day she can nearly double or more the damage you've already done this turn. She can even set up wounds herself to some degree with supporting cards like {{Card|Brego}} (which might as well be her matching mount), {{Card|Eowyn's Sword, Dernhelm's Blade}}, and {{Card|Rohirrim Javelin}}.
| |
| | |
| She does need some healing, and there are some strong {{C|Rohan}} options to do so, like {{Card|Leowyn}} and {{Card|Rohirrim Shield}}. She can also use {{Card|Rohirrim Helm}} to force your opponent to make an unpleasant choice: either she exerts a minion (which will doubtless immediately be doubled by her ability), or she escapes an unwanted skirmish. If the minion is [[exhausted]] already, she just gets off scot-free. {{Card|Merry, Swordthain}} is technically a {{C|Shire}} card (and is discussed more below), but can repeatedly [[recur|retrieve]] all of these disposable possessions for reuse. If you're stacking possessions on her, you'll need some protection against {{Card|Grima, Wormtongue}}, but {{C|Shire}} or {{C|Dwarven}} cards (also discussed below) can do that.
| |
| | |
| {{C|Rohan}} doesn't have much for wounding tools beyond Lady of Ithilien, though. {{Card|Rohirrim Javelin}} (retrieved by Merry) and possibly {{Card|Aldor, Soldier of Edoras}} can add a few points of [[archery]]. Rainbow Wounding doesn't usually run {{Card|Merry's Sword}} despite its strength, due to a lack of appropriate companions to spot. They do, however, have {{Card|Eomer, Third Marshal of Riddermark}}, a strong [[tank]] who benefits from having wounded minions to skirmish. And, while the {{C|Rohan}} initiative card, {{Card|Fell Deeds Awake}}, is fairly weak, they have strong tools to manipulate initiative, like {{Card|Leowyn}} and {{Card|Deor}}.
| |
| | |
| == Good Sméagol Always Helps ==
| |
| | |
| {{Card|Smeagol, Always Helps}} is a strong addition to any Rainbow Wounding deck. Not only because he wounds minions, first [[exhaust]]ing them with his game text then killing them with a direct-wounding card, but also because of the costs involved in doing so. Rather than exerting himself (and requiring healing), he generates [[threat]]s and consumes cards in [[hand]]. He can also deal with often-troublesome high-vitality minions, especially [[Enduring]] ones, like {{Card|Shelob, Her Ladyship}} (assuming he doesn't get excluded from skirmishes by her!) and {{Card|Sauron, the Lord of the Rings}}.
| |
| | |
| His game text only exhausts minions, and, with his low strength, he may still be in danger. The challenge is finding that last wound. The usual tool is {{Card|Don't Look At Them}}, which is powerful (often enough to kill minions on its own!) and [[cycle]]s unneeded cards out of your hand, but can usually only be used once or twice a turn. You can also finish off minions with {{Card|Where Shall We Go}}, or because he has a Frodo [[signet]], {{Card|No Use That Way}}. A {{C|Shire}} contingent in your deck means you can also finish off a minion he's exhausted with {{Card|Mind Your Own Affairs}} or {{Card|Unheeded}}. Since the exhausting happens when Sméagol is ''assigned'' and not when he actually resolves his skirmish, {{Card|Eowyn, Lady of Ithilien}} or {{Card|Bow of the Galadhrim}} can snipe the minion before it becomes time for him to skirmish.
| |
| | |
| If Sméagol wins his skirmish, he has powerful tools that trigger from that. {{Card|Don't Follow The Lights}} can pick off another minion with no need for wounding. {{Card|Not Listening}} can heal him and remove the burdens placed by the {{C|Shire}} direct wounding cards (which, in turn, can activate {{Card|The Shire Countryside}} for more healing, in a {{C|Shire}} deck.)
| |
| | |
| While Sméagol relies on a card combo to do any work, he's not much of a downside the rest of the time. He's just generating one twilight per move, and only costs one burden to play. The worst thing that happens is that he might get killed, but that's one minion that wasn't contributing to an [[overwhelm]] on some other companion. He's best with [[hobbit]]s, who often already have tools that can help protect him like {{Card|Merry, Friend to Sam}} on top of the synergistic wounding tools, but he can work well with any culture on his own.
| |
| | |
| == Hobbits ==
| |
| | |
| The [[hobbit]]s of the {{C|Shire}} have a variety of [[direct wounding]] tools, as well as two different strong healing [[Value Engine|engine]]s, one of which also tidily cleans up any excess [[burden]]s in the process. All of this power comes at the cost of needing to protect the vulnerable, low-strength hobbits, but that's what all the wounding and healing is for, right?
| |
| | |
| Firstly, there are the "bouncing" hobbits that can send themselves back to your hand: {{Card|Pippin, Wearer of Black and Silver}} and {{Card|Merry, Swordthain}}. WOBAS can help fend off a dangerous minion at early sites (as long as it isn't a [[Nazgul]]), and Merry can help re-arm {{Card|Eowyn, Lady of Ithilien}} if her possessions are discarded. But, more importantly, when they return to your hand, all of their [[wound]]s are wiped clean. You don't even need a roaming minion to send WOBAS back to your hand; you can just use his ability whenever you like, as long as he's not currently assigned to a skirmish. You can use this to soak [[undirected wounds]] like [[archery]], but that vitality can be put to more proactive use.
| |
| | |
| {{Card|Shadowplay}} can exert exert your hobbits to exert enemy minions when they come into play, often preventing those from even using [[Shadow Phase]] [[exert]]ion abilities. Since this is happening so early in the turn, it can enable almost any other Free Peoples direct wounding card in the game, especially {{Card|Legolas, Greenleaf}} and Lady of Ithilien above. On top of this, {{Card|Unheeded}} can cut in and kill minions at any time as long as they're exerting, be it from your cards or Shadow cards. These abilities aren't just strong ways to keep from having to skirmish minions: they can also protect your deck from targeted [[hate]] cards like {{Card|Grima, Chief Counselor}}, {{Card|Grima, Wormtongue}}, or {{Card|Ulaire Enquea, Lieutenant of Morgul}}. Shadowplay/Unheeded with bouncing hobbits can be a self-sustaining source of wounds all game in a deck primarily focused on another culture, and if the hobbits end up being less useful, they can simply be discarded or [[Chump Blocking|thrown under the bus]].
| |
| | |
| {{Card|Shire}} culture also has strong skirmish wounding, generally based on placing [[burden]]s to wound minions who are skirmishing Frodo or Frodo-[[signet]] characters. Some of these don't even require any hobbits, despite being {{C|Shire}} cards: {{Card|No Use That Way}} can wound any minion skirmishing a Frodo-[[signet]] companion (like Greenleaf or Always Helps, above!) and {{Card|Power According to His Stature}} can wound minions skirmishing any [[ring-bearer]], which is especially strong against [[swarm]] decks. Some do have a bit of [[cultural enforcement]], though: {{Card|Cliffs of Emyn Muil}} can wound any minion skirmishing any hobbit, and {{Card|Mind Your Own Affairs}} spots Frodo to wound a minion skirmishing a Frodo-signet companion. All of these events can be [[recur]]red with {{Card|Birthday Present}}, albeit at the cost of even more burdens. {{Card|Frodo, Wicked Masster!}} has a minion-wounding ability of his own, albeit at such a high cost that he is rarely played.
| |
| | |
| The burden costs end up being a soft form of cultural enforcement, however. Firstly, [[Frodo]] generally has the highest practical [[resistance]] of any [[ring-bearer]] in a [[rainbow]] deck, especially if you're playing {{Card|Frodo, Resolute Hobbit}}. But hobbits also have a very strong [[initiative]] condition that removes a burden almost every turn, sometimes more than once a turn: {{Card|A Light In His Mind}}. {{Card|Sam, Resolute Halfling}} can activate it almost at will, while serving as a well of exertions for Shadowplay/Unheeded. That usually isn't enough burden removal on its own, but it can be supplemented with {{Card|Frodo's Cloak}}, {{Card|Brace of Coneys}}, {{Card|Nine-fingered Frodo and the Ring of Doom}}, and, if you're using Sméagol, {{Card|Not Listening}}. {{Card|No Help For It}} [[Combo|combined]] with {{Card|Frodo, Master of the Precious}} is another way to dump burdens while also healing Sméagol by replaying him.
| |
| | |
| All of this burden removal may seem excessive, but you often want to place and remove as many burdens as possible because of another powerful {{C|Shire}} card: {{Card|The Shire Countryside}}. Every time you remove a burden, it heals a companion for ''each'' copy of Shire Countryside you have, which can turn into quite a lot of healing! Funnel that healing to a character with a powerful exert-to-wound ability, and you can mow down troublesome minions every turn.
| |
| | |
| == Gimli and Slaked Thirsts ==
| |
| | |
| [[Gimli]]—almost always {{Card|Gimli, Bearer of Grudges}} or {{Card|Gimli, Feared Axeman}}—can bring a lot to a Rainbow Wounding deck. The main benefit to having him is {{Card|Preparations}} and {{Card|Slaked Thirsts}}. Not only is Slaked Thirsts a powerful card, placing two wounds for the cost of one exertion, you don't need to keep Gimli healthy to use it. You can make sure any excess healing (for example, from a [[sanctuary]]) won't go to waste by using it to place Slaked Thirsts on Preparations. Any extra copies of Preparations won't go to waste either, since they can be used as a (weak) direct-wounding card. If you draw Slaked Thirsts, you can play it when you have exactly three other cards in hand to quickly lose then regain initiative for the other cultures' initiative [[condition]]s. Slaked Thirsts is also a powerful tool for stymieing obnoxious
| |
| | |
| Having a single dwarf in your deck also opens up a lot of other cards, especially if your deck already has lots of healing. {{Card|Ever My Heart Rises}} (generally [[download]]ed with {{Card|Dunharrow Plateau}}) can help your deck set up more consistently to start, as long as you can don't mind [[mill]]ing yourself a little bit. {{Card|Gimli's Battle Axe, Trusted Weapon}} contributes an extra archery wound once some [[threat]]s are stacked, although some decks instead use {{Card|Axe of Erebor}} since it can get a strength bonus freeing up any Shadow cards stuck on EMHR. {{Card|Blood Runs Chill}} can discard some minions who survived the [[skirmish phase]] or clean out your opponent's [[support area]]. {{Card|Ring of Fury}} is a good choice to help protect Gimli, and it also boosts Blood Runs Chill and can be [[download]]ed with {{Card|The Binding Ring}}
| |
| | |
| gimli RB or condition gimli - slaked thirsts, preparations, trusted weapon. can start EMHR or preparations. baruk khazad and quick as may be
| |
| aragorn's bow - elessar telcontar or king in exile, gondor bowmen, hardy garrison, defend it and hope
| |
| gandalf - mainly terrible and evil
| |
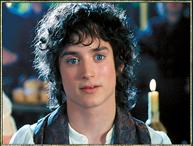
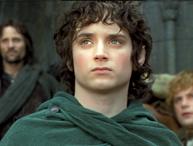
Frodo is one of the protagonists of The Lord of the Rings, the hobbit who steadfastly carries the One Ring from the Shire to Mount Doom, where it is destroyed by Gollum. In this game, he is the default ring-bearer companion, and indeed was the only ring-bearer until the ninth expansion set. Except for his unusually high resistance, his low strength (3) and relatively high vitality (4) are typical of hobbits, but generally make him the most vulnerable part of your Fellowship.
Frodo has a suite of special rules to his name. He's always ring-bound, even if it doesn't say so on his card. Except in the case of Frodo, Frenzied Fighter (13R149)
 , he's always your ring-bearer if he's in your deck, and thus costs zero twilight. Until Reflections, he was the only possible ring-bearer at the start of the game, and (along with Sam) was one of only two characters with a resistance score.
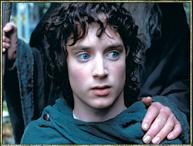
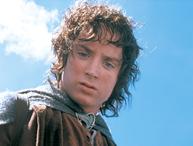
Because he is almost always your ring-bearer and so vulnerable to being overwhelmed in a skirmish, getting the most out of Frodo involves protecting him, ideally keeping him away from skirmishes altogether. He has the One Ring, but in most cases that is a poor defense against being overwhelmed. Some decks will drag him into a skirmish anyway, however. To make him a bit safer, you can give him something to boost his strength. Permanent buffs include Hobbit Sword (1C299)
 , some version of Sting (1R313)
 , A Promise (2R112)
 , or O Elbereth! Gilthoniel! (2R108)
 . You can also pump his strength temporarily, especially with Merry, Friend to Sam (1R302)
 , Boromir, Son of Denethor (1U97)
 , or Hobbit Intuition (1C296)
 . You can protect him from being overwhelmed, with cards like Bounder (1C286)
 or The Tale of the Great Ring (10U116)
 . Or, in early formats like Fellowship Block and Towers Standard, you can simply cancel his skirmish, with cards like Hobbit Stealth (1C298)
 , O Elbereth! Gilthoniel! (2R108)
, Filibert Bolger, Wily Rascal (2C101)
, O Elbereth! Gilthoniel! (2R108)
, Filibert Bolger, Wily Rascal (2C101)
 , or Frodo's Cloak (4R303)
 .
.
Frodo has three different roles in three different periods of the game. For the first eight sets, you have to play him, but you can cancel his skirmishes. There's no way around it in Fellowship Block, Towers Standard, Towers Block, or King Standard: you have to find a way to protect Frodo.
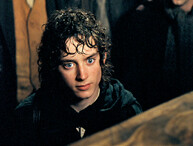
Versions of Frodo[edit]
| Portrait |
Name |
Game Text
|
|
|
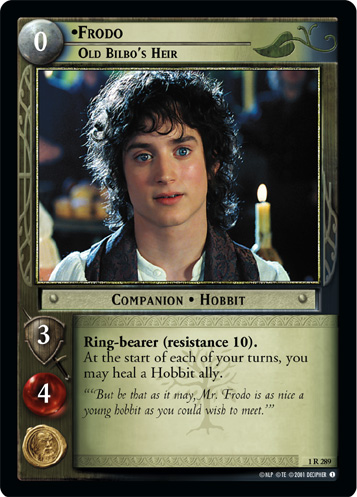
Frodo, Old Bilbo's Heir (1R289)
|
Ring-bearer (resistance 10).
At the start of each of your turns, you may heal a Hobbit ally.
|
|
|
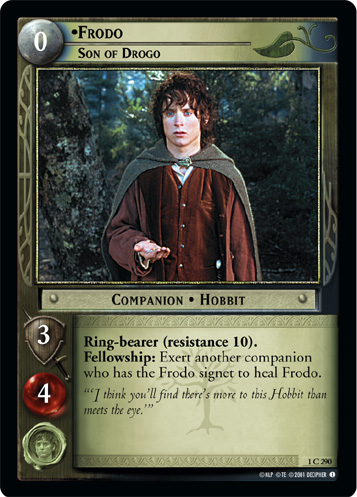
Frodo, Son of Drogo (1C290)
|
Ring-bearer (resistance 10).
Fellowship: Exert another companion who has the Frodo signet to heal Frodo.
|
|
|
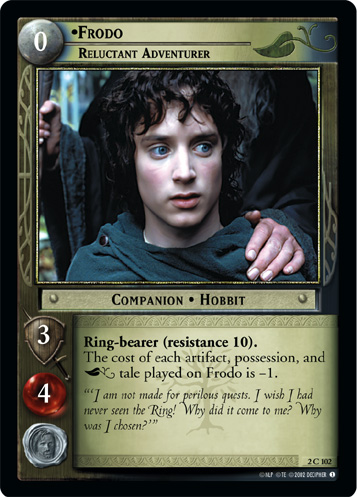
Frodo, Reluctant Adventurer (2C102)
|
Ring-bound. Ring-bearer (resistance 10).
The cost of each artifact, possession, and  tale played on Frodo is -1. tale played on Frodo is -1.
|
|
|
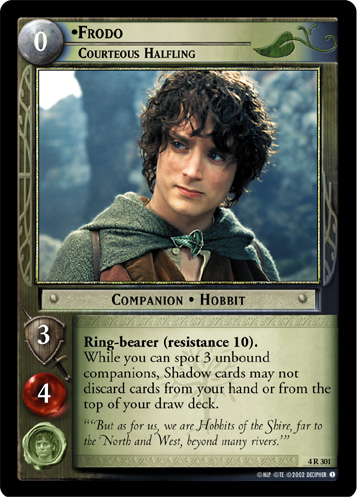
Frodo, Courteous Halfling (4R301)
|
Ring-bearer (resistance 10).
While you can spot 3 unbound companions, Shadow cards may not discard cards from your hand or from the top of your draw deck.
|
|
|
Frodo, Tired Traveller (4C302)
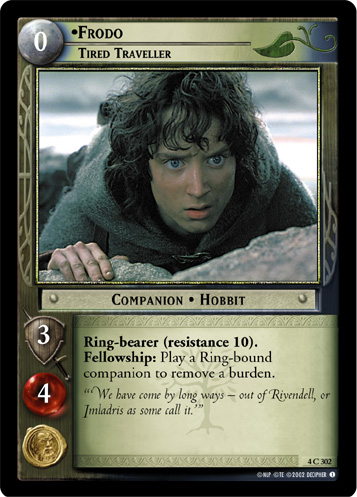
|
Ring-bearer (resistance 10).
Fellowship: Play a Ring-bound companion to remove a burden.
|
|
|
Frodo, Master of the Precious (5U111)
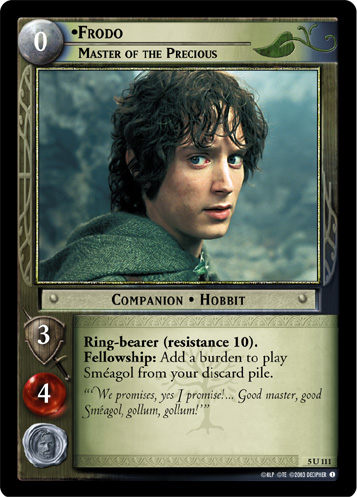
|
Ring-bearer (resistance 10).
Fellowship: Add a burden to play Sméagol from your discard pile.
|
|
|
Frodo, Hope of Free Peoples (7C317)
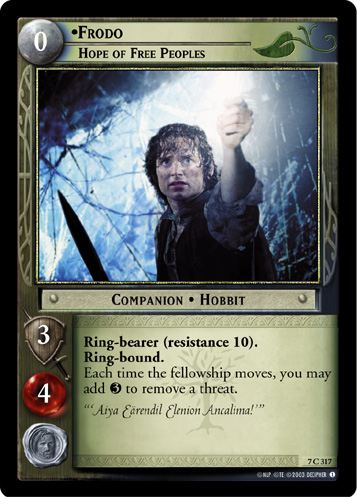
|
Ring-bearer (resistance 10).
Ring-bound.
Each time the fellowship moves, you may add  to remove a threat. to remove a threat.
|
|
|
Frodo, Wicked Masster! (7R318)
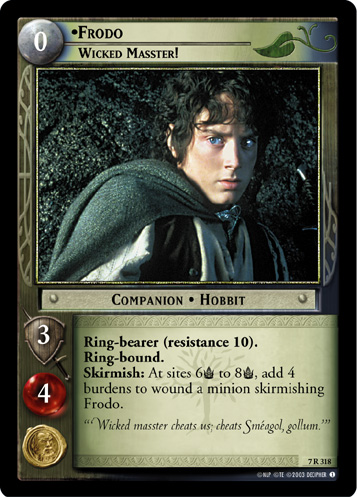
|
Ring-bearer (resistance 10).
Ring-bound.
Skirmish: At sites 6 to 8, add 4 burdens to wound a minion skirmishing Frodo. to 8, add 4 burdens to wound a minion skirmishing Frodo.
|
|
|
Frodo, Resolute Hobbit (10P121)
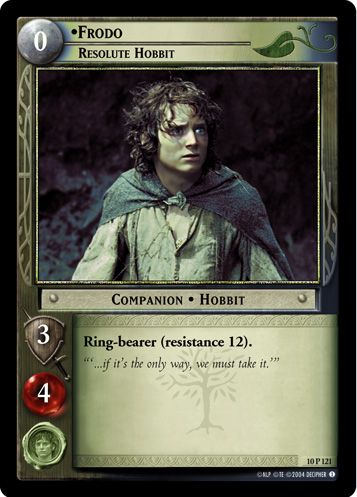
|
Ring-bearer (resistance 12).
|
|
|
Frodo, Protected by Many (11S164)
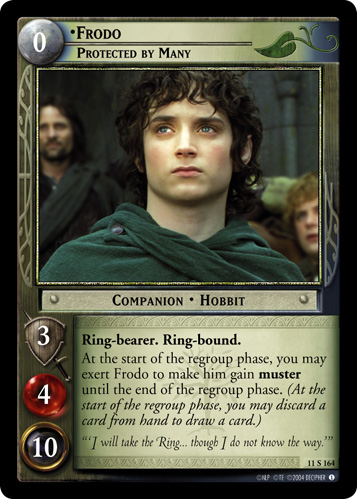
|
Ring-bearer. Ring-bound. At the start of the regroup phase, you may exert Frodo to make him gain muster until the end of the regroup phase. (At the start of the regroup phase, you may discard a card from hand to draw a card.)
|
|
|
Frodo, Frenzied Fighter (13R149)
|
Ring-bound.
While you can spot more minions than companions, Frodo cannot be overwhelmed unless his strength is tripled.
Skirmish: If Frodo is not assigned to a skirmish, exert Frodo to have him replace a Ring-bound companion skirmishing a minion.
|
|
|
Frodo, Weary From the Journey (15C144)
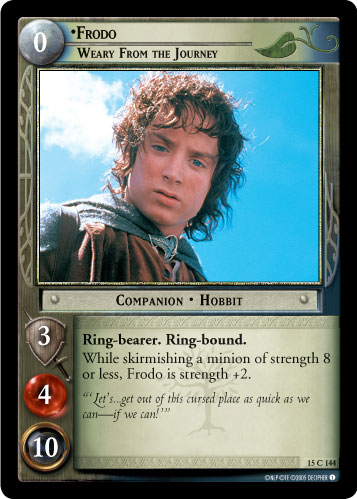
|
Ring-bearer. Ring-bound.
While skirmishing a minion of strength 8 or less, Frodo is strength +2.
|
|
|
Frodo, Little Master (19P28)
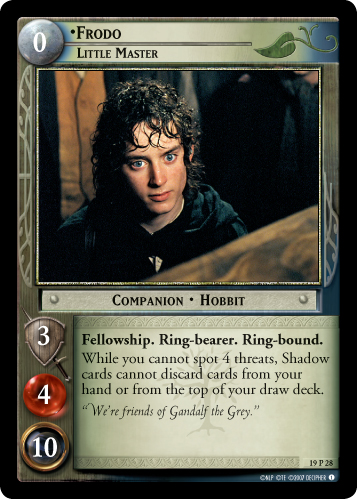
|
Fellowship. Ring-bearer. Ring-bound.
While you cannot spot 4 threats, Shadow cards cannot discard cards from your hand or from the top of your draw deck.
|
|
|
Frodo, Mr. Underhill (0P67)
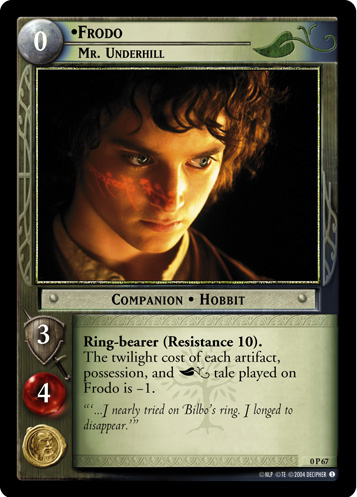
|
Ring-bound. Ring-bearer (resistance 10).
The cost of each artifact, possession, and tale played on Frodo is -1.
|
|
|
Frodo, Mr. Underhill (0W25)

|
Ring-bearer.
|
Cards which mention Frodo by name[edit]
to-do
See Also[edit]