|
|
| (60 intermediate revisions by the same user not shown) |
| Line 1: |
Line 1: |
| Ninja Gollum is the main {{C|Gollum}} [[Shadow Alignment|Shadow]] deck which focuses on killing off a single [[companion]] (usually with [[direct wounding]]) then crushing the entire [[Fellowship]] with a stack of [[threat]]s. This wouldn't normally be enough wounding on its own to finish off most Fellowships, but {{Card|Promise Keeping}} effectively doubles those wounds, and the deck often runs other sources of wounding to soften up the Fellowship. The deck relies on [[King Block]] cards, so it first appears in [[Movie Block]], then remains popular in all later formats (except [[French]]).
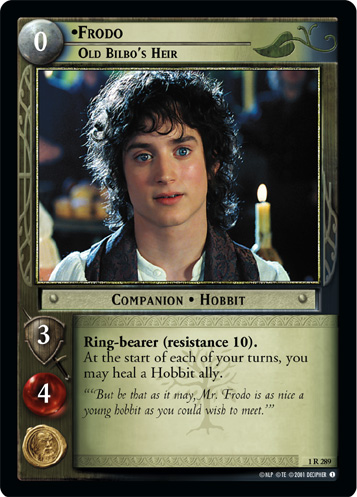
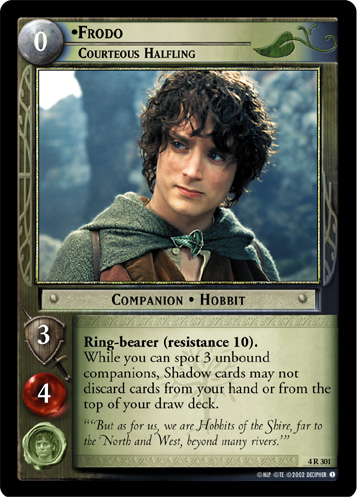
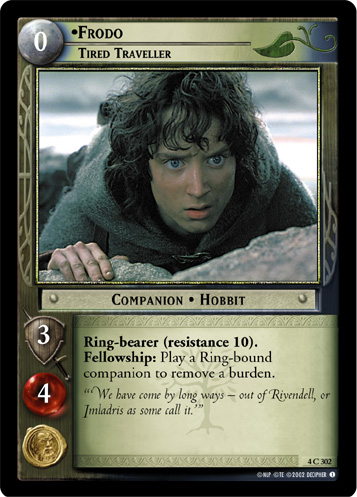
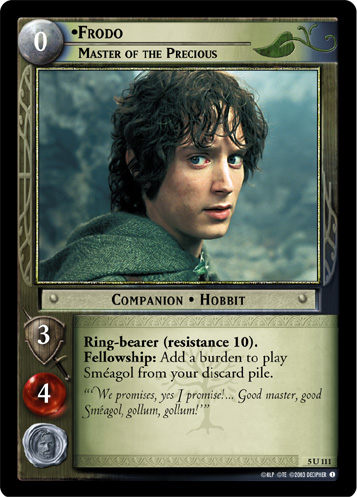
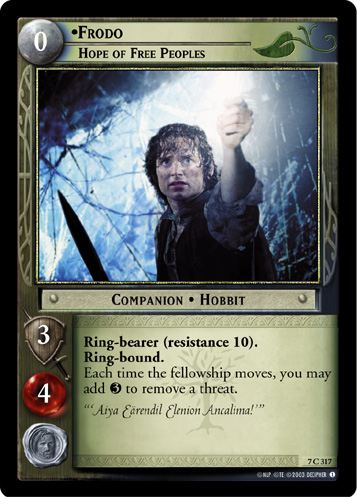
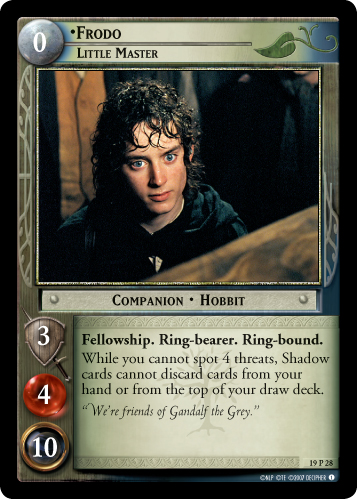
| | Frodo is one of the protagonists of ''The Lord of the Rings'', the [[hobbit]] who steadfastly carries [[the One Ring]] from the Shire to Mount Doom, where it is destroyed by [[Gollum]]. In this game, he is the default [[ring-bearer]] [[companion]], and indeed was the only ring-bearer until [[Reflections|the ninth expansion set]]. Except for his unusually high [[resistance]], his low [[strength]] (3) and relatively high [[vitality]] (4) are typical of hobbits, but generally make him the most vulnerable part of your [[Fellowship]]. |
|
| |
|
| == The Promise Keeping Combo ==
| | Frodo has a suite of special rules to his name. He's always [[ring-bound]], even if it doesn't say so on his card. Except in the case of {{Card|Frodo, Frenzied Fighter}}, he's always your [[ring-bearer]] if he's in your deck, and thus costs zero [[twilight]]. Until [[Reflections]], he was the only possible [[ring-bearer]] at the start of the game, and (along with [[Sam]]) was one of only two characters with a [[resistance]] score. |
| Ninja Gollum's core [[Combo|combo]] is {{Card|Promise Keeping}} and a large stack of [[threat]]s. Every time Gollum or Shelob kills a character in a skirmish, each threat wound gets doubled. The timing of {{Card|Promise Keeping}} means the Shadow player and Free Peoples player take turns when a companion is killed in a skirmish: the Shadow player places an exertion (unless the skirmish win was an [[overwhelm]]), the Free Peoples player places a threat wound, the Shadow player places an exertion, and so on, repeating until all the threat wounds are placed. If the threat stack was large enough, this can cripple a Fellowship or kill it outright, especially if the Free Peoples player forgot to (or couldn't afford to) put on [[the One Ring]].
| |
|
| |
|
| The next key addition to this combo is {{Card|They Stole It}} or, in [[Expanded Format|Expanded]], {{Card|Not This Time!}}. The wounds from these cards are doubled by {{Card|Promise Keeping}}, so {{Card|They Stole It}} and a hand of six cards or more can kill an unwounded three-[[vitality]] character, triggering the threat cascade. {{Card|Not This Time!}} does weaken your threat stack, but it makes it easier to preserve cards in your hand or chew through high-vitality characters. You can supplement these conditions (or maybe even score the actual kill) with {{Card|You're A Liar and a Thief}} or {{Card|Frenzied Attack}} (although the latter is rare, due to the difficulty of playing it). They're one-shot events, but they do wounds with the right timing to be doubled by Promise Keeping.
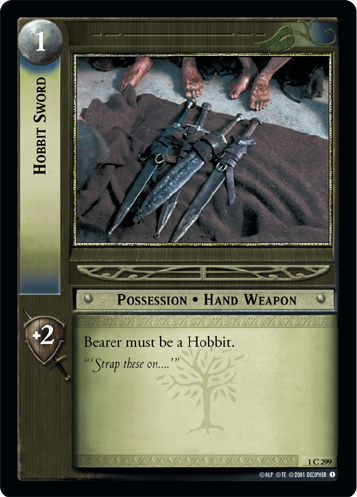
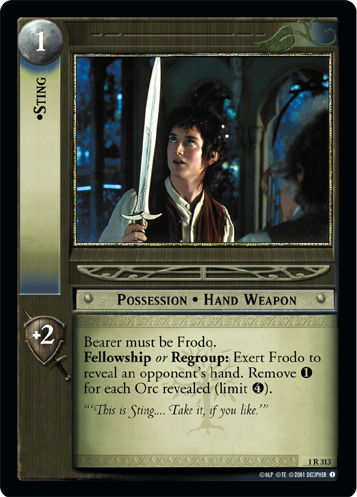
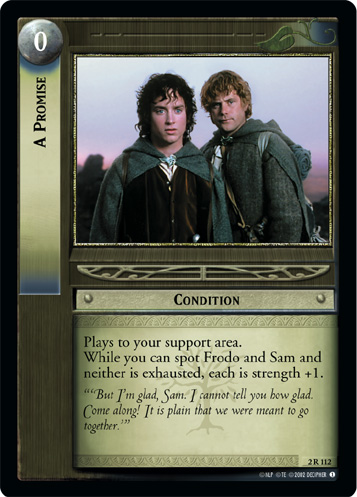
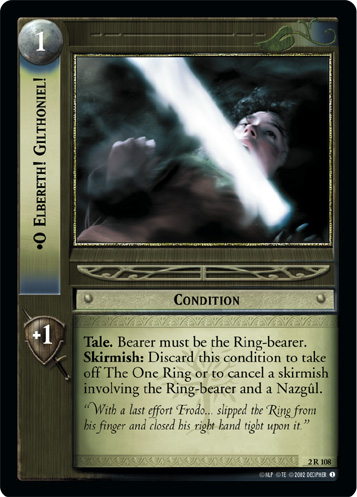
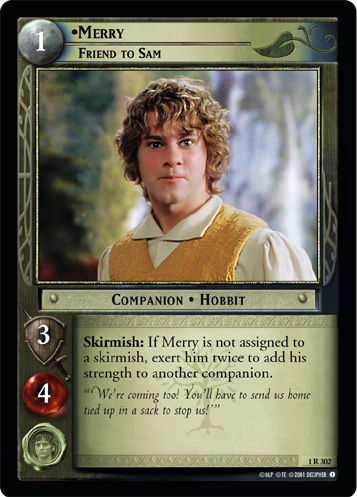
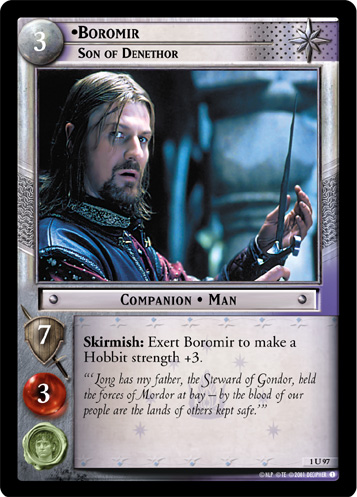
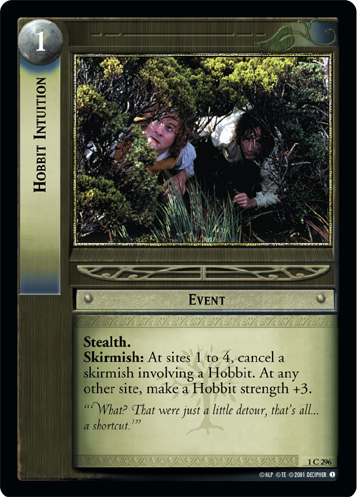
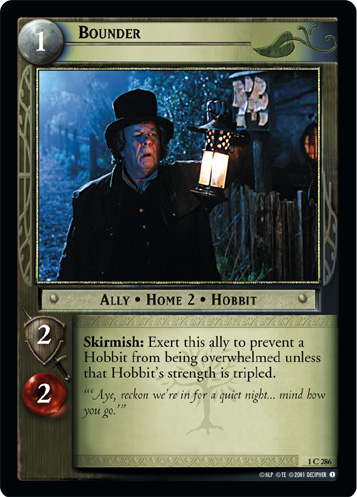
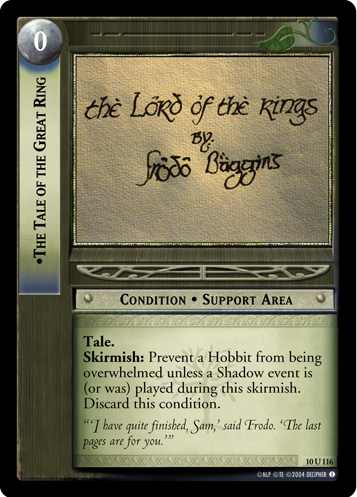
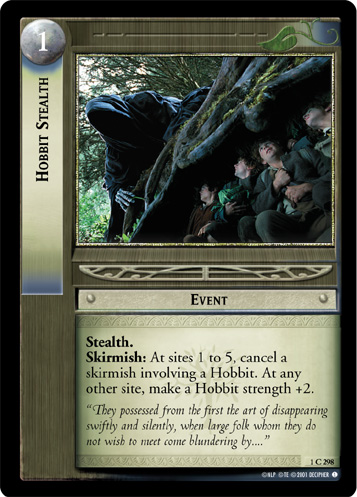
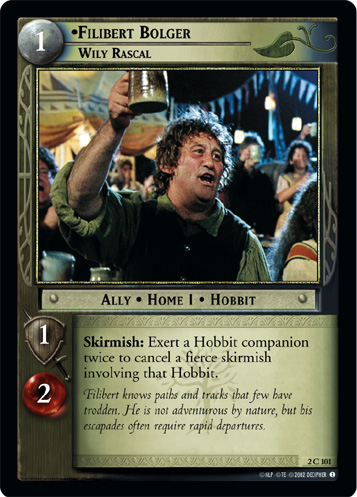
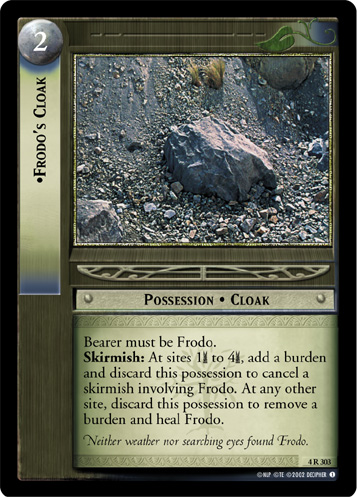
| | Because he is almost always your ring-bearer and so vulnerable to being [[overwhelm]]ed in a skirmish, getting the most out of Frodo involves protecting him, ideally keeping him away from [[skirmish]]es altogether. He has [[the One Ring]], but in most cases that is a poor defense against being overwhelmed. [[Swarm|Some decks]] will drag him into a skirmish anyway, however. To make him a bit safer, you can give him something to boost his strength. Permanent buffs include {{Card|Hobbit Sword}}, some version of {{Card|Sting}}, {{Card|A Promise}}, or {{Card|O Elbereth! Gilthoniel!}}. You can also [[pump]] his strength temporarily, especially with {{Card|Merry, Friend to Sam}}, {{Card|Boromir, Son of Denethor}}, or {{Card|Hobbit Intuition}}. You can protect him from being overwhelmed, with cards like {{Card|Bounder}} or {{Card|The Tale of the Great Ring}}. Or, in early formats like [[Fellowship Block]] and [[Towers Standard]], you can simply cancel his skirmish, with cards like {{Card|Hobbit Stealth}}, {{Card|O Elbereth! Gilthoniel!}}, {{Card|Filibert Bolger, Wily Rascal}}, or {{Card|Frodo's Cloak}}. |
|
| |
|
| ===Support cards===
| | Frodo has three different roles in three different periods of the game. For the first eight sets, you have to play him, but you can [[Skirmish Cancellation|cancel his skirmishes]]. There's no way around it in [[Fellowship Block]], [[Towers Standard]], [[Towers Block]], or [[King Standard]]: you have to find a way to protect Frodo. |
|
| |
|
| You need to generate some threats to make this combo work, of course. {{Card|Captured By The Ring}} can do that, while also [[download]]ing a Gollum of your choice. {{Card|Fat One Wants It}} is another good source of threats. In [[Expanded Format|Expanded]], there's {{Card|Gollum, Threatening Guide}}, who can't help much to generate initial threats, but can grow a large stack or restart the stack with one threat after killing a character. Threatening Guide and {{Card|Not This Time!}} are a strong way to mop up a weakened Fellowship. You can also get threats from other cultures, with cards like {{Card|Ulaire Cantea, Faster Than Winds}} or {{Card|Ulaire Lemenya, Eternally Threatening}}.
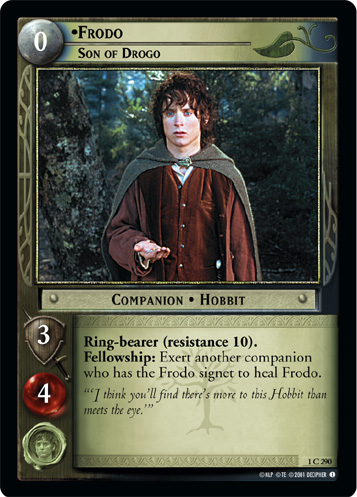
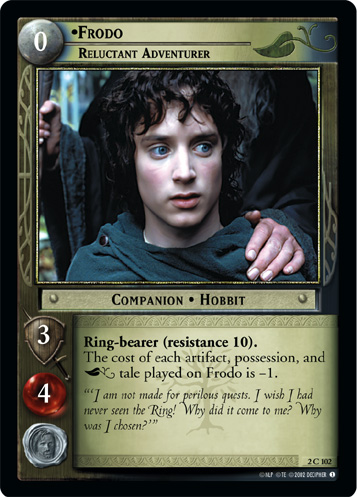
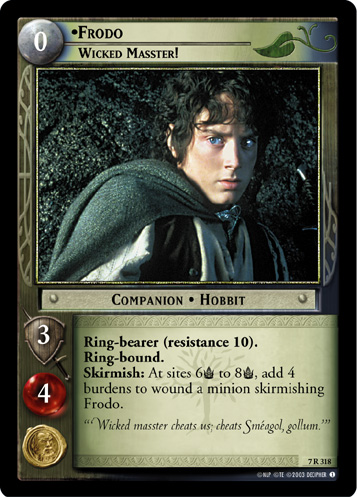
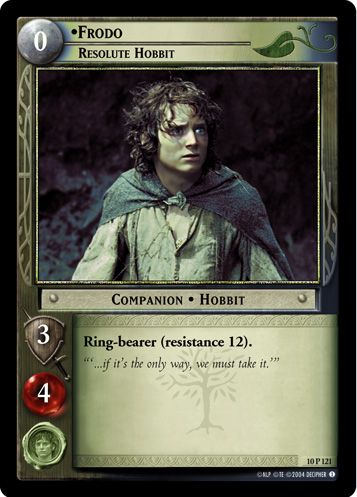
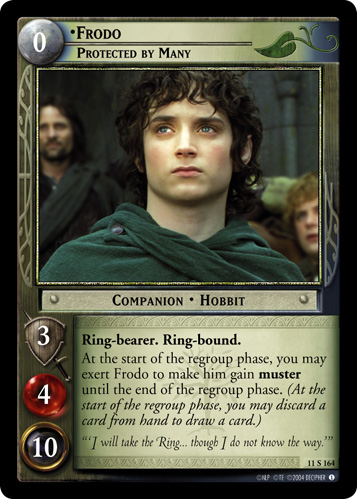
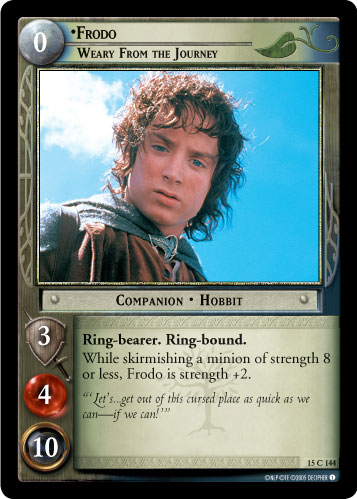
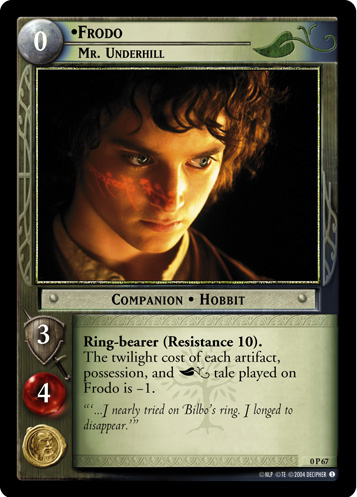
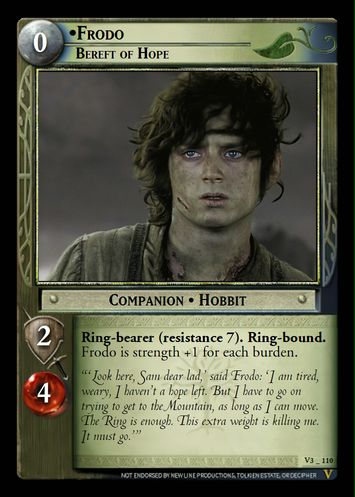
| | == Versions of Frodo == |
| | {{PersonaTable|Frodo}} |
|
| |
|
| The deck can use any version of Gollum, and often runs multiple different copies to have a choice which to grab with {{Card|Captured By The Ring}} or {{Card|We Must Have It}}. {{Card|Gollum, Mad Thing}} is a strong skirmisher (especially with {{Card|Hidden Even From Her}}) that can set up burdens for {{Card|Gollum, Stinker}}, {{Card|Gollum, Threatening Guide}} can be a strong skirmisher, {{Card|Gollum, Dark as Darkness}} can add extra wounds or help pay for other minions (and occasionally sneak a kill on an [[exhausted]] ring-bearer), and {{Card|Gollum, Old Villain}} can help [[cycle]] your hand before you get {{Card|They Stole It}} out. Most versions of this deck run three or four copies of {{Card|Shelob, Her Ladyship}} to help counter the handful of companions that can prevent this deck from going off, although some replace one with a single copy of {{Card|Shelob, Eater of Light}} to [[download]] {{Card|Web}}.
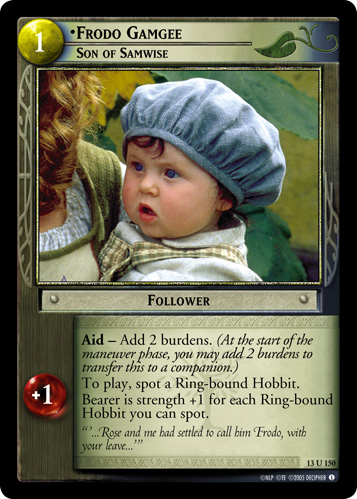
| | == Cards which mention Frodo by name == |
|
| |
|
| Since you can only have four each of Gollum and Shelob, the deck runs cards to help [[download]] and [[recur]] them. {{Card|We Must Have It}} and {{Card|Captured By The Ring}} are as good as extra copies of Gollum. Some decks even run a copy or two of {{Card|So Polite}}, for more cards that can replay Gollum. {{Card|Evil-smelling Fens}} can recur Shelob or other utility minions [[splash]]ed into the deck. {{Card|Web}} can ensure that both Gollum and Shelob appear over and over again until they are killed. In [[Expanded Format|Expanded]], {{Card|Sudden Strike}} can [[download]] Shelob or a splashed utility minion, and {{Card|Incited}} and {{Card|Not Easily Avoided}} can help set up or replay any {{C|Gollum}} cards you need.
| | ''to-do'' |
|
| |
|
| Ninja Gollum also runs other cards to help soften up the Fellowship, usually with more exertions and wounds. These are often [[splash]]ed in from other cultures, especially in [[Movie Block]], but {{Card|Evil-smelling Fens}} and {{Card|Sudden Strike}} can grab them. {{Card|Ulaire Enquea, Lieutenant of Morgul}} can punish large Fellowships, especially when they have many weakened companions. {{Card|Morgul Ambusher}} appreciates the threat stack Ninja Gollum decks often build up. {{Card|Desert Lord}}, and in Expanded, {{Card|Mumak Commander, Giant Among the Swertings}} can place two wounds while posing a threat in a following skirmish. {{Card|Gothmog, Morgul Leader}} is good for three wounds, while buffing Shelob with three wounds. {{Card|Grima, Wormtongue}}, {{Card|Isengard Smith}}, {{Card|Southron Leader}}, and {{Card|Grima, Servant of Another Master}} can all disrupt some Free Peoples strategies. {{Card|Sauron, The Lord of the Rings}}, {{Card|Orc Slaughterer}}, and {{Card|The Balrog, Demon of Might}} can simply overwhelm some decks. Expanded adds some wounding options in other phases in {{C|Gollum}} culture, like {{Card|Little Snuffler}}, {{Card|Horribly Strong}} (great with extra copies of Gollum in hand, especially Dark as Darkness!) or {{Card|Unseen Foe}}. These cards aren't doubled by {{Card|Promise Keeping}}, but they can help soften up the Fellowship for a killing blow. Be careful: killing a companion outside of the skirmish phase means missing out on doubling your threat wounds with Promise Keeping, although a kill and a pile of wounds can hardly be considered a bad thing! Just don't overload your deck with too many splashed supplementary cards. Or do, I'm not your dad.
| | == See Also == |
| | * {{Card|Frodo Gamgee, Son of Samwise}} |
|
| |
|
| Gollum and Shelob can use some help winning skirmishes on turns when the {{Card|Promise Keeping}} combo isn't set up. {{Card|Hidden Even From Her}} makes Gollum [[fierce]], which is great for {{Card|Gollum, Mad Thing}}, {{Card|Gollum, Stinker}}, and {{Card|Gollum, Threatening Guide}} (but terrible for some other versions of Gollum, particularly {{Card|Gollum, Dark as Darkness}}). {{Card|Unabated in Malice}} and {{Card|Not Easily Avoided}} are the main [[pump]]s for Gollum and Shelob in Movie Block and Expanded respectively, although there are other options: {{Card|Hobbitses Are Dead}} and {{Card|Cunningly Hidden}} are pump events that can [[recur|replay]] themselves from the discard pile. {{Card|Slippery As Fishes}} is a situational strength buff that also doubles as a way to [[cycle]] a particularly bad hand, although Ninja Gollum decks rarely lack for cycling tools. {{Card|Chasm's Edge}} is always worth at least one strength, but gets even better against [[Hobbit]]s or {{Card|Faramir, Son of Denethor}}. {{Card|Saruman, Servant of Sauron}} is worth an extra two strength where you need it and adds in a few handy wounds to boot.
| | [[Category:Unique Characters]] |
| | |
| The rest of the deck is made up of utility cards to help the whole thing play more smoothly. {{Card|Final Strike}} shuts down a variety of annoying strategies. {{Card|Evil-smelling Fens}}, {{Card|Incited}}, and {{Card|Sudden Strike}} all help grab key cards. {{Card|Treacherous Little Toad}} shuts down healing, and by extension can silence a companion with an annoying exertion ability. {{Card|Deceit}} protects your vulnerable [[support area]]. {{Card|Led Astray}} can send the Fellowship to obnoxious sites like {{Card|Doorway to Doom}}, although it's of limited use against an opponent that's in the lead except to counter their own [[Site Manipulation|site manipulation]] cards.
| |
| | |
| Ninja Gollum is unusual in that it can benefit from your [[Free Peoples]] deck and vice versa, above and beyond the usual methods of [[cycling]], [[filter]], and choosing a synergistic [[site]] path. If your Free Peoples deck uses [[Gandalf]], you can [[Starting Fellowship|start]] any version of [[Smeagol]] and immediately sacrifice him with {{Card|Saved From the Fire}} to [[tutor]] three key Shadow {{C|Gollum}} cards. If you'd rather play a Free Peoples deck more focused on Sméagol, {{Card|It's Mine}} and {{Card|Incited}} can help draw cards for both sides, and {{Card|Cunningly Hidden}}, {{Card|Naked Waste}}, and {{Card|Not Easily Avoided}} all benefit from both sides' {{C|Gollum}} cards.
| |
| | |
| ===Sites===
| |
| Ninja Gollum is common in both [[Movie Block]] and post-[[Shadows]] formats like [[Expanded Format|Expanded]], so what sites you want depends on the format.
| |
| | |
| Movie Block uses the [[King Block]] site path. Important sites in this site path for Ninja Gollum:
| |
| * Site 1 - Avoid using {{Card|Rohirrim Road}}, although its impact is generally low. Any other site 1 is fine.
| |
| * Site 2 - {{Card|Rohirrim Camp}} can be effective against an unskilled opponent who dumps their hand and [[flood]]s. {{Card|King's Tent}} is also an option, since Movie Ninja Gollum is generally not a large threat at early sites. Neither site is terribly important, though.
| |
| * Site 3 - {{Card|Hall of the Kings}} can tempt opponents into setting up your threat stack for you if you, especially if you haven't given away your Shadow side yet. (Simply playing Gollum is generally not a giveaway, but playing most {{C|Gollum}} conditions will be.) {{Card|The Dimholt}} benefits {{Card|Slippery as Fishes}}, although that's rarely worth putting it in your deck unless you're also running [[Gondor Wraiths]] as your own Free Peoples deck.
| |
| * Site 4 - {{Card|City of the Dead}} can tutor {{Card|Shelob, Her Ladyship}}, albeit at a high cost. Ninja Gollum almost always has the spare vitality for {{Card|Pelennor Prairie}} and often likes buffing {{Card|Gollum, Mad Thing}} with <!--Anduin Banks-->{{Card|7U341}}. {{Card|City of the Dead}} and <!--Anduin Banks-->{{Card|7U341}} are both sites that benefit {{Card|Slippery as Fishes}}, too.
| |
| * Site 5 - {{Card|Steward's Tomb}} is almost always the best choice, to stymie wound prevention and slow down healing. {{Card|Pelennor Flat}} is an alternative for a more burden-focused deck. Be careful with {{Card|City Gates}}: if the Fellowship moves into the site with threats stacked already and you don't use them at site 5, the site will often remove more threats than it added.
| |
| * Site 7 - {{Card|Osgiliath Channel}} can be a beating if you have {{Card|Shelob, Her Ladyship}} and {{Card|Web}} in play: stop one companion from skirmishing on the first turn, then force the Fellowship to move, and replay Shelob to paralyze a second companion. It may not be a better option than generically-useful sites like {{Card|Osgiliath Crossing}} or {{Card|Ruined Capitol}}, though. All of these sites benefit {{Card|Slippery as Fishes}}; the only one that doesn't is the rarely-played {{Card|Pelennor Grassland}}.
| |
| * Site 8 - {{Card|Northern Ithilien}} is the obvious choice, although {{Card|Morgulduin}} is an option if you have lots of ways to (re)play Gollum and also enough [[Nazgul]] to make it worthwhile.
| |
| * Site 9 - {{Card|Dagorlad}} or {{Card|Slag Mounds}} can help you finish the game, depending on how much focus your deck already has on corruption.
| |
| | |
| In [[Site#List of Shadows Block Sites|the post-Shadows site path]], few cards benefit Ninja Gollum's game plan in particular. (Make sure to avoid {{Card|Cavern Entrance}}, which harshly punishes Ninja Gollum's tricks, and {{Card|Foot of Mount Doom}}, which permanently delete cards you would rather fish out of your discard pile later.) You can always stack [[river]]s, [[mountain]]s, and [[underground]] sites to benefit {{Card|Slippery as Fishes}}, but you might be better off simply using sites that add wounds, threats, or burdens. Wounding sites include <!--Anduin Banks-->{{Card|11U227}}*, {{Card|Doorway to Doom}}*, <!--Isengard Ruined-->{{Card|15U192}} (if you run {{Card|Saruman, Servant of Sauron}}), or {{Card|Neekerbreekers' Bog}}. You can set up threats with {{Card|Abandoned Mine Shaft}}*, <!--Pelennor Flat-->{{Card|11S254}}, or <!--Slag Mounds-->{{Card|11S258}}, or set up an extra couple threats with <!--City Gates-->{{Card|15S189}}. You can also make up for Ninja Gollum's lack of [[Condition Removal|condition removal]] with {{Card|Buckland Homestead}} (if your deck runs utility [[Nazgul]]) or {{Card|Dol Guldur}}. {{Card|Mount Doom}}* and {{Card|Sirannon Ruins}}* are always useful. (Sites marked with an asterisk benefit {{Card|Slippery as Fishes}}.
| |
| | |
| ==Variants==
| |
| Ninja Gollum decks often supplement their strategies with [[corruption]], as an alternate route to win, to pressure the opponent to pick the option to buff {{Card|Gollum, Mad Thing}}, or just to discourage soaking threats with [[the One Ring]]. {{Card|Gollum, Stinker}} can serve as enough deterrent on his own, but the deck often also runs {{Card|Ulaire Enquea, Lieutenant of Morgul}}. Other options include {{Card|Ulaire Toldea, Messenger of Morgul}}, {{Card|Morgul Creeper}}, and {{Card|Ulaire Cantea, Black Assassin}}. {{Card|Heavy Burden}}, {{Card|Nasty, Foul Hobbitses}}, and {{Card|Not Yet Vanquished}} can add more burdens, too.
| |
| | |
| There's a [[corruption]] [[bomb]] combo using {{Card|Watcher in the Water, Keeper of Westgate}} and {{Card|Northern Ithilien}}, and as such it only works in [[Movie Block]]. Play {{Card|Evil-Smelling Fens}} and stack up [[threat]]s, either beforehand or on the turn you go off. Once you get to {{Card|Northern Ithilien}}, play Gollum, ideally using the site's gametext. (If you don't already have threats stacked beforehand, playing {{Card|Plotting}} on the turn you plan to go off can help.) Then, play the Watcher, which will discard Gollum. (A second copy of Evil-Smelling Fens can help pull the Watcher out of your discard pile.) At this point, play Gollum over and over using the site's text, placing two [[burden]]s and immediately discarding Gollum each time. This combo can stack up as many burdens as you can get threats, usually up to the size of the [[Fellowship]]. The combo is not especially reliable, so it's usually not the main focus of a deck.
| |
| | |
| {{Card|Little Snuffler}} can kill the ring-bearer stone dead in the early game, and some decks use it along with cards that exert or wound the ring-bearer (e.g. {{Card|Gollum, Dark as Darkness}}, [[Morcs]], {{Card|Doorway to Doom}}) to fish for a quick early-game kill, ideally in the first three sites. It mostly relies on a perfect draw or some sort of extreme setup to guarantee a perfect hand. And if your opponent has any counter, like any wound prevention, healing, or vitality cards or one of several versions of [[the One Ring]], the whole trick falls apart. As a deck, it's a flimsy gimmick, but any Ninja Gollum deck can run {{Card|Little Snuffler}} and some of these cards and occasionally scam a free win.
| |
| | |
| == Counterplay ==
| |
| | |
| [[Condition Removal|Condition removal]]. Ninja Gollum has almost all of its power tied up in the [[support area]], so condition removal can cripple it. {{Card|Secret Sentinels}}, {{Card|Vilya}}, {{Card|Company of Archers}}, {{Card|Namarie}}, {{Card|Sleep, Caradhras}}, {{Card|Deep in Thought}}, {{Card|Grown Suddenly Tall}}, {{Card|Bilbo, Well-spoken Gentlehobbit}}, {{Card|Fortress Never Fallen}}, {{Card|Fortress Never Fallen}}, {{Card|Let Us Be Swift}}, {{Card|Blood Runs Chill}}, {{Card|Clever Hobbits}}, and {{Card|Gladden Homestead}} are all a beating against Ninja Gollum. {{Card|Web}} isn't a condition, but the prevalence of strong support area possessions in other Shadow decks means that many Free Peoples decks run {{Card|Roll of Thunder}}, {{Card|Derufin}}, {{Card|Throne of Minas Tirith}}, or {{Card|Arrow-slits}} to deal with them. {{Card|Final Strike}} can protect against many of these cards, as long as Gollum is in play and has the vitality to exert. In Expanded, {{Card|Deceit}} covers this weakness very well, although it can't protect against Vilya or Gladden Homestead, and does not protect effectively against some of these cards without holding back [[twilight]] every turn.
| |
| | |
| Wound prevention. Preventing wounds with cards like {{Card|Eowyn, Lady of Rohan}}, {{Card|Huorn}}, {{Card|Hosts of the Last Alliance}}, {{Card|Sapling of the White Tree}}, or {{Card|Narsil, Blade of the Faithful}} not only makes it harder to kill someone to trigger the threat stack, but it also means that those wounds don't get doubled by {{Card|Promise Keeping}}. {{Card|Gimli's Helm}}, {{Card|From the Armory}}, {{Card|Faramir, Wizard's Pupil}}, and {{Card|Lorien Protector}} can soak a full stack of threats harmlessly. Cards that prevent companions from taking more than one wound per skirmish phase, like {{Card|Armor}} and {{Card|King's Mail}}, or prevent wounds entirely, like {{Card|Swept Away}} in [[Gondor Wraiths]], can be a double-sided sword: that companion can stop Gollum from getting any use out of {{Card|They Stole It}}, but they also limit how many wounds a character can absorb from a successfully-triggered threat stack. Cards that discard characters that would die, like {{Card|The Dead City}} or {{Card|Elessar's Edict}}, are very rare, but can also prevent a threat stack from being triggered. {{Card|Shelob, Her Ladyship}} can sometimes help by excluding a particular character, but many of these abilities still work even if a different character is skirmishing.
| |
| | |
| Similarly, [[healing]] and high [[vitality]] can be a soft counter to Ninja Gollum. While it definitely sucks to lose a companion then have to soak 10+ wounds from a full stack of threats, a fully-healed Fellowship can survive that and finish the game despite the setback. [[Aragorn]], [[Gandalf]], {{Card|Durin III}}, {{Card|Cirdan, the Shipwright}}, {{Card|Gil-Galad, Elven High King}}, {{Card|Elendil, the Tall}}, and {{Card|Grimbeorn, Beorning Chieftain}}, and most [[ent]]s are hard to kill in the first place to trigger the threat stack, and can soak up the wounds even if it does go off. Hobbits are especially vulnerable to {{Card|They Stole It}}, but they often have a great deal of healing from cards like {{Card|The Shire Countryside}}, {{Card|Fates Entwined}}, and the [[Hobbit Hospital]] healing ally package to come back from a bad turn. Elves often have strong healing, from cards like {{Card|Elrond, Herald to Gil-Galad}}, {{Card|Shadow Between}}, and {{Card|Nenya, Ring of Adamant}}, and in some decks can offload wounds to self-healing allies with {{Card|Shoulder to Shoulder}}. [[Gondor Knights]] can often soak some wounds, prevent some sounds with {{Card|Sapling of the White Tree}}, and heal the rest off with {{Card|Banner of Westernesse}} and {{Card|Card|Aragorn, Captain of Gondor}}.
| |
| | |
| Skirmish cancellation. Since Ninja Gollum runs relatively few minions at a time, it's very vulnerable to having those skirmishes cancelled, leaving Gollum and Shelob twisting in the wind, having accomplished nothing. {{Card|Gandalf's Staff}}, {{Card|Rorrihim Helm}} (recurred with {{Card|Merry, Swordthain}}), {{Card|No Visitors}} (recurred with {{Card|Daddy Twofoot, Next-door Neighbor}}), and {{Card|Halfling Leaf}} are all particularly obnoxious, since they are reusable. {{Card|Warmed Up A Bit}}, {{Card|Severed His Bonds}}, {{Card|Swiftly and Softly}}, and {{Card|Tom Bombadil}} can also be annoying, although they aren't reusable and aren't common. ({{Card|Boromir's Gauntlets}}, {{Card|Escape}}, {{Card|Merry, Learned Guide}}, and {{Card|Pippin, Wooly-footed Rascal}} are rarely a significant concern, since Ninja Gollum often doesn't spent every last bit of [[twilight]].)
| |
| | |
| Removing [[threat]]s can help soften Ninja Gollum's impact. The simplest solution is to let a low-value companion or ally die. Ideally you'd do this in a way that avoids {{Card|Promise Keeping}}: let them die to a non-{{C|Gollum}} minion, or kill them off outside of the [[skirmish phase]], when you have a card that can prevent a whole threat stack like {{Card|Gimli's Helm}} and {{Card|Faramir, Wizard's Pupil}} lined up, or simply when Promise Keeping isn't in play. Otherwise, threat removal is rare: {{Card|Citadel to Gate}}, {{Card|Nine-fingered Frodo and the Ring of Doom}}, {{Card|Glorfindel, Eldarin Lord}}, and {{Card|Sting, Elven Long Knife}} are the main cards of note. [[Gondor Wraiths]] generates a lot of threats, but also runs plenty of cards to remove them that are rarely seen in other decks, like {{Card|Frodo, Hope of Free Peoples}}, {{Card|Aragorn, Driven By Need}}, and of course {{Card|Stronger and More Terrible}}.
| |
| | |
| Many abilities that punish events or prevent abilities can shut down Ninja Gollum. {{Card|Faramir, Captain of Gondor}} and {{Card|Spirit of the White Tree}} shut down {{Card|They Stole It}} and {{Card|Not This Time!}}, making them high-priority targets for {{Card|Shelob, Her Ladyship}}. <!--Cavern Entrance-->{{Card|11S232}} stops all of Gollum's skirmish tricks, but {{Card|Led Astray}} can prevent it from being a problem. {{Card|Perspective}} shuts down a whole spectrum of Ninja Gollum tricks, albeit at the cost of helping set up the threat stack. {{Card|Gandalf, Wise Guide}} can shut down events, up to and including simply playing him with {{Card|Captured By the Ring}} in the first place.
| |
| | |
| [[Direct wounding]] and [[archery]] are generally not a problem for Ninja Gollum, since Gollum and Shelob have high [[vitality]]. {{Card|Shelob, Her Ladyship}} even punishes archery. However, some direct wounding decks can pose a problem, especially if they can [[exhaust]] minions. [[Gondor Knights]] can use {{Card|Fourth Level}} can exhaust Gollum or Shelob, who can then be picked off with {{Card|Turgon, Man of Belfalas}}, {{Card|Citadel of the Stars}}, or {{Card|Gondor Bow}}. [[Gondor Rangers]] can neutralize one of them when they're roaming with {{Card|Mablung, Soldier of Gondor}} and {{Card|Ranger's Bow}}. (In Expanded, this matchup is much worse, as {{Card|Madril, Defender of Osgiliath}} sets them up to be easily discarded with {{Card|Ithilien Blade}}.) Similarly, {{Card|Smeagol, Always Helps}} can exhaust one, then kill them with {{Card|Don't Look At Them}} or an event like {{Card|No Use That Way}}. {{C|Rohan}} culture can often muster enough wounding to finish off Ninja Gollum's minions, with cards like {{Card|Merry's Sword}}, {{Card|Eowyn, Lady of Ithilien}}, some wounds from archery, and exertions from [[mount]]s. Again, sometimes neutralizing a key companion with {{Card|Shelob, Her Ladyship}} can help somewhat, particularly in the case of Mablung or Sméagol, and {{Card|Final Strike}} can shut down many of these abilities, but sometimes this is just a bad [[matchup]].
| |
| | |
| {{Card|They Stole It}} and {{Card|Not This Time!}} don't work when Gollum is skirmishing an [[ally]], and {{Card|Promise Keeping}} only doubles wounds dealt to companions. This doesn't come up often! {{Card|Horn of Boromir}} is banned in all common formats where Ninja Gollum is played, and {{Card|Support of the Last Homely House}} and {{Card|One Whom Men Would Follow}} are both unusual cards, but Gollum often can't do much to Elrond or {{Card|Tom Bombadil}} in a skirmish.
| |
| | |
| Cards that punish [[roaming]] minions will affect Shelob for most of the game due to her high [[Site Number|site number]]. This isn't a problem in most cases: small strength bonuses or direct wounding are of little concern, and she can often negate a single character with an anti-roaming-minion ability. However, {{Card|What Are They?}} and {{Card|Ithilien Blade}} can discard her harmlessly for most of the game.
| |
| | |
| ==Example Decklists==
| |
| | |
| * [https://lotrtcgwiki.com/forums/index.php?topic=10002.0 Solo Smeagol/Ninja Gollum], a Movie Block deck by ket_the_jet on the Last Homely House forums
| |
| * [https://lotrtcgwiki.com/forums/index.php?topic=11763.0 Gollum Shadow], a Movie Block deck by GilGalad44 on the Last Homely House forums
| |
| * [https://lotrtcgwiki.com/forums/index.php?topic=7056.0 Don't Threaten Me/Ninja Gollum], a Movie Block deck by NappyKorn on the Last Homely House forums
| |
| | |
| * [https://lotrtcgwiki.com/forums/index.php?topic=12023.0 Hobbits and Gollum], an Expanded deck by Tunadan on the Last Homely House forums
| |
| * [https://lotrtcgwiki.com/forums/index.php?topic=1359.0 Multi cultural wounding with ninja gollum], an Expanded deck by alehaak on the Last Homely House forums
| |
| | |
| * [https://lotrtcgwiki.com/community/viewtopic.php?t=4459 Ninja Revolutionized: The New Ninja Gollum], a guide to building Ninja Gollum decks. This guide was written after the release of [[Treachery and Deceit]], so it was aimed at a format substantially similar to [[Standard]] format on [[GEMP]].
| |
| * [https://lotrtcgwiki.com/community/viewtopic.php?t=1666 Threats and Toads: Understanding Ninja Gollum Reloaded], a guide to building Ninja Gollum decks in [[Standard]] format shortly after the release of [[The Hunters]]. Not relevant to any popular formats in 2022, but interesting to show the historical development of the deck.
| |
| | |
| ----
| |
| | |
| {{Gameplay_Table}}
| |
 , he's always your ring-bearer if he's in your deck, and thus costs zero twilight. Until Reflections, he was the only possible ring-bearer at the start of the game, and (along with Sam) was one of only two characters with a resistance score.
 , some version of Sting (1R313)
 , A Promise (2R112)
 , or O Elbereth! Gilthoniel! (2R108)
 . You can also pump his strength temporarily, especially with Merry, Friend to Sam (1R302)
 , Boromir, Son of Denethor (1U97)
 , or Hobbit Intuition (1C296)
 . You can protect him from being overwhelmed, with cards like Bounder (1C286)
 or The Tale of the Great Ring (10U116)
 . Or, in early formats like Fellowship Block and Towers Standard, you can simply cancel his skirmish, with cards like Hobbit Stealth (1C298)
 , O Elbereth! Gilthoniel! (2R108)
 , or Frodo's Cloak (4R303)
 .
.